We’ve all been there – whether it’s your next-door neighbors or your roommates, no one is exempt from having to hear the occasional commotion through their walls. And, of course, you may occasionally be loud yourself.
So, to protect yourself and your neighbors, I’ve brought you a step-by-step guide on how to soundproof your walls by combining drywall with resilient channels, green glue, MLV, and other similar products.
If you’d like to know more about the cheapest ways to soundproof a wall, I have an article about that right there. However, I’m about to present a guide on the single best way to insulate walls, regardless of the cost. In the following article, you’ll learn the exact steps you should take in order to ensure the best soundproofing money can buy. So, where should you start?
- 1. Check the Condition of the Wall
- 2. Prepare the Tools and Materials
- 3. Fill the Empty Stud Cavities With Soundproof Insulation
- 4. Install Mass Loaded Vinyl
- 5. Attach Resilient Channels
- 6. Put Up the First Layer of Drywall
- 7. Add Green Glue and Another Layer of Drywall
- 8. Seal All Gaps With Acoustic Caulk
- Final Thoughts: Find the Right Combination
1. Check the Condition of the Wall
Before you can start thinking about how to install drywall and other materials, you have to see what you’re dealing with. When soundproofing open walls or ones that are already under construction, the wooden frame of the wall (or wall studs) should be visible without tearing anything down.
However, when renovating walls with existing insulation, you’ll need to add several more steps to this task. Take down the old drywall and check the existing insulation. Then, decide how to proceed.
While checking the condition of the wall or walls that need soundproofing, also keep an eye out for possible obstructions. So, take note of the locations of the windows and doors, electrical boxes and wires, water or gas pipes, and other obstructions that might impede your work.
An expert would draw and write down the exact measurements of all the surfaces that need to be covered. But, if you’re soundproofing without the help of a professional, you can easily jot down these notes yourself. That will ensure that you have the proper amount of the materials for the next steps.
Once you’ve written down all the measurements, go on to the next step.
2. Prepare the Tools and Materials
Before getting to work on any project, it’s best to have all of your tools and materials ready to use. So, what should you prepare before embarking on your mission?
In order to have the best soundproofing possible, you’ll need to get wall insulation, Mass Loaded Vinyl, resilient channels, and drywall of your choosing before you start working. You’ll also need green glue compound and acoustic caulk. The next sections of this article will dive into detail on why someone might need each of these materials.
Make sure to only buy the correct amounts of each product, according to the walls’ measurements. Just to be sure, though, purchase some extra materials.

Next, buy or borrow some basic tools before starting. If possible, it’s best to avoid having to look for tools and materials once you’re already ankle-deep in drywall.
Also, get a caulking gun ready – that is a tool for applying green glue or acoustic sealant. You’ll also need some cutting tools for MLV and insulation. Depending on their thickness, grab a knife or scissors. Finally, prepare a screw gun you can use to put up resilient channels and drywall, as well as a hammer or a pneumatic stapler for MLV.
Once the tools and materials are all set, you can finally go back to the walls you’re soundproofing.
3. Fill the Empty Stud Cavities With Soundproof Insulation
Our next move will be to fill empty stud cavities with soundproof insulation. The walls should already be stripped to the studs – the wooden frame of the wall. The insulation you prepared in the last step will neatly fit into the rectangular frames of the walls. That should remove any air gaps between the wooden boards – which allow sound to travel through walls in the first place.
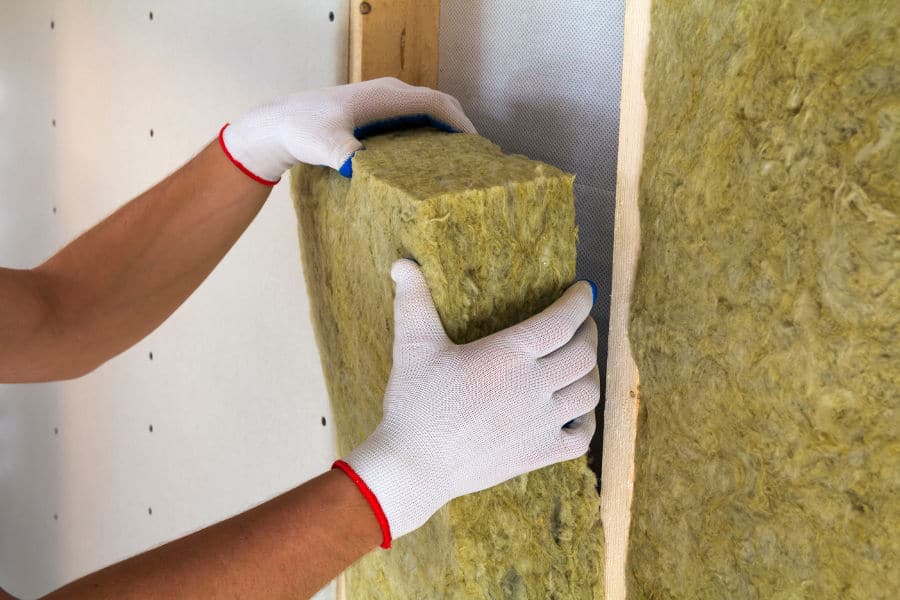
Work around any of the previously noted obstacles by cutting into the isolation with a serrated edge knife. Making these cutouts might take some practice, but even if some air gaps remain, you can fix them later.
That doesn’t need to be done using special acoustic insulation, either. Use regular insulation or the existing one in the walls if it’s still functional. In fact, regular insulation is often cheaper, even though it’s about the same thickness as soundproof insulation.
However, there is still a definite difference between the two. In my opinion, the best soundproofing insulation on the market is Rockwool’s acoustic mineral wool. That product really proves that there’s a world of difference between it and regular insulation.
If you decide against using soundproof insulation, or you still have some air gaps, there are other things that can stop sound from traveling through walls. For example, MLV is a great soundproofing material, and here’s why.
4. Install Mass Loaded Vinyl
Mass Loaded Vinyl is basically a miracle material in the world of soundproofing. You can use it pretty much anywhere, as it’s fairly flexible and thin, and extremely long-lasting. Its heightened mass serves to completely block sound, whereas high-density soundproofing absorbs it. I already wrote a whole article about MLV for those who want to learn more.
- High-Efficiency Sound sound barrier quiet...
- Mass-loaded vinyl 1 lb sound proofing for...
- Environmentally safe - Non-toxic and...
- Improve sound quality, creating a serene...
So, how can you work MLV into your wall soundproofing process? Here are the steps to follow:
- Lay MLV on the floor and measure and cut the desired length with a knife or scissors. Make sure that the individual pieces are bigger than the gaps between the wall studs so that you can nail them to the frame. Ideally, there would be a 2-inch overlap between different pieces of MLV.
- Having an extra pair of hands to help hold the cut pieces of MLV over the insulation that you pressed between the studs earlier is helpful. Position the straight edges of the material at the top and the bottom of the wall’s frames.
- Attach MLV with nails, screws, or a pneumatic stapler, starting from the top of the frames and working downwards. Starting with the sides is also alright, but starting at the top helps ensure that the edge is flush with the ceiling.
- While nailing MLV, keep the seams of separate MLV pieces close together so that they don’t peel off. Just like when packing in the insulation, you’ll need to watch out for electrical boxes and other obstacles. Any gaps can be sealed with PVC tape. The application of MLV doesn’t need to be attractive, as it’ll be covered by drywall anyway.
Once you’ve installed MLV, you can move on to resilient channels.
5. Attach Resilient Channels
If you don’t have any experience with soundproofing techniques, you might not know what resilient channels even are. In fact, they might even look a bit strange. So, before I get into how to go about attaching them, allow me to quickly explain what resilient channels are.
Basically, resilient channels are sheet metal rails that are attached to the wooden frame of the room. They should be screwed in horizontally across the vertical wall studs and at a 90-degree angle to the ceiling joists. These metal rails are supposed to lay over the insulation and support the drywall so that it’s not directly attached to the studs.
The reason for putting resilient channels in is that research has shown that they can bump our experience of sound up to 5 STC levels, or Sound Transmission Classes. When properly installed, they are shock-absorbent, and they actually redistribute noise until it dissipates. That might not sound like much, but it could be the difference between hearing the neighbors fighting through the walls and enjoying complete silence.
My favorite resilient channels are the ones Trademark Soundproofing makes. There are some pictures of how resilient channels are supposed to look on the wall studs on their product page on Amazon.
6. Put Up the First Layer of Drywall
As I mentioned at the beginning of this article, the best soundproofing job is bound to be a bit taxing on your wallets. So, why not create a budget with soundproof drywall in mind? Regular drywall would work, and it’s certainly the more budget-friendly option. But, why not go all out, for the sake of peace and quiet?
Soundproof drywall is a combination of gypsum boards and special layers (viscoelastic or ceramics) that increase mass and density, which are the most important aspects of good soundproofing materials.
QuietRock or SilentFX are great examples of such type of drywall. They can be an excellent choice for wall and ceiling soundproofing. The increase in price might even be worth it, especially for people who need silence, like those with music studios.

Regardless of which drywall you end up going for, the installation process will be pretty similar.
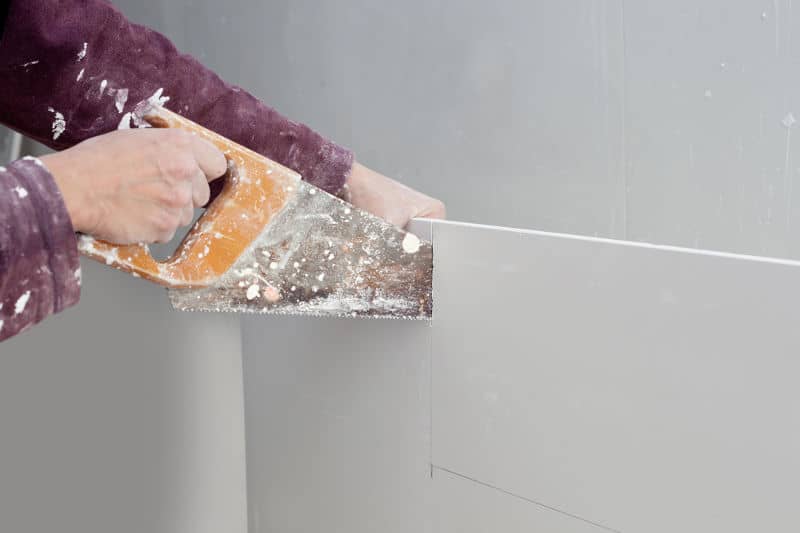
When cutting drywall, make sure to use the very tip of the utility knife. Only apply enough pressure to cut into the first layer of the material – not completely sever it. After slightly cutting into the drywall, it should snap off neatly. When it does, cut through the paper in the back and smooth any rough edges.
Next, cut out window and door notches from a single drywall sheet. You can use a drywall saw to complete this task. However, make sure to mark the spots before installing the drywall. You’ll also need a spiral saw to cut around smaller obstructions, like outlets.
Then screw the drywall onto the resilient channels, making sure not to touch the studs or joists. Driving the drywall mounting screws into the studs will make the resilient channels become pretty much useless. So, aim at the channels between the studs.
7. Add Green Glue and Another Layer of Drywall
It’s like I always say: two drywalls are better than one. Alright, no one says that. But for our purposes, it’s true. Adding another layer of a dense material will significantly lower the amount of noise that enters or exits the room.
Before adding another layer of drywall, though, having an acoustic compound as an in-between layer would reduce sound even more. Green Glue Compound is a cheap soundproofing material that decouples surfaces that transmit sounds.
- A 29 oz Tube of Green Glue Damping Compound...
- Coverage of 16 square feet
- Highest quality soundproofing damping...
- Use between 2 layers of drywall or plywood...
It’s similar to resilient channels, as it too dissipates sound vibrations. Green Glue only works when applied between two firm layers at a thickness of at least 0.5 mm, though. I’ve written more about Green Glue products in this article for anyone who wants to learn more.
So, you already have the gist of it – the Green Glue goes between two drywall panels. It’s not a necessary step to take, especially since resilient channels can also do a lot of what Green Glue would.
8. Seal All Gaps With Acoustic Caulk
Finally, acoustic caulk can help patch up the last few gaps that could ruin all of the hard work you just did.
Acoustic caulk is a rubber-like material meant to plug holes that would let air pass through – and therefore, sound. Due to its rubbery consistency and durability, it’ll stay flexible and won’t crack.
You’ll need a caulking gun to apply this sealant everywhere air could possibly get through. That means the seams between drywall sheets (the corners of the room), as well as the spaces between the drywall and the windows and doors. Also, apply it generously where the wall meets the ceiling and floor.
Acoustic caulk will adhere to any building material and adapt to its properties because of its flexibility. If you’re interested in reading more about acoustic sealants, how to use them, and which ones are my personal favorites, you can head on over to this article.
Final Thoughts: Find the Right Combination
Doing all of these soundproofing techniques isn’t strictly necessary in order to ensure that you have your privacy. For example, I mentioned that Green Glue and resilient channels basically serve the same purpose. So, you may be able to get away with using just one of those.
Or, if your budget really can’t handle soundproof insulation, just go with regular insulation and compensate with other methods. Soundproofing should be set up according to individual needs, after all.
Some readers might already be measuring their rooms and preparing materials. Others might be reading through my article about the cheapest ways to soundproof a wall. The good thing about soundproofing is – there’s something out there for everyone.
RELATED POSTS: