If you’re preparing for a soundproofing project, you’ve probably already done an extensive amount of research. What materials to use, how to apply them, what works best, etc. You probably already have all that figured out. But, what about the gaps?
When you’re soundproofing, it’s critical that you don’t leave any gaps. Otherwise, you shouldn’t have even bothered with the project at all. Any hole, even the smallest one, can completely negate the work you’ve done.

For the purpose of sealing gaps and seams to prevent sound leakage, we recommend you to use acoustic caulk (sealant). It’s primarily used as a sound inhibitor. However, it has other benefits, as well. In this article, we will explain what those benefits are, why acoustic caulk is better than regular caulk, and where and when you can apply it.
BEST ACOUSTIC SEALANTS:

Acoustic Caulk vs. Regular Caulk: What’s the Difference
It’s important to remember that anywhere the air can get through, sound can as well. Therefore, it’s crucial to pay close attention to any gaps and seal them. Acoustic caulk is exceptionally efficient. But, what makes it better than the regular caulk? In short, the main features of the acoustic caulk (sealant) are:
- non hardening (designed to stay flexible)
- no shrinkage or cracks
- more durable than regular caulk
- a more permanent solution
Firstly, the main difference between acoustic caulk and regular, silicone caulk is the permanent flexibility. That is the most important and the most useful feature of the acoustic caulk.
Regular caulk hardens and can crack or shrink quickly. The cracks mean that the sealant is no longer useful and the sound can pass through unobstructed. On the other hand, acoustical caulk remains flexible, which means that it can’t crack. Therefore, if you’re more interested in a permanent solution for your soundproofing project, the acoustic sealant is the way to go.
Another difference is that the acoustic caulk adheres firmly to any building material. It will stay tightly connected to the surface or material you’ve applied it to precisely because it’s that flexible and it can’t crack or shrink. It will maintain the suppleness for many years and won’t dry down.
Acoustic caulk is essentially a rubber-like material that doesn’t harden when used to create sound barriers. It’s a non-flammable sealant that’s usually latex-based, explicitly designed to reduce sound transmission. Furthermore, acoustic sealant acts as a vapor barrier as well. The main benefits and the main differences that set acoustic sealant from regular caulk apart are:
- reduces draft and sound transmission
- easy to apply and clean
- remains soft and pliable
- doesn’t migrate or change shape
Best Acoustic Caulks
We already established that the acoustic caulk would seal all the gaps and secure all seams you might have in your soundproofing project. But, which one to choose? Which one has the best quality-price ratio?
Here, we’ll review three of the best acoustic caulks. The number one, in our opinion, is the Sashco caulk.

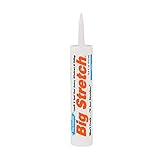
1. Big Stretch Sashco Caulk
- easy to apply
- stays flexible
- adheres very well
- turns clear as it dries
Undoubtedly the best acoustic sealant on the market, Sashco caulk has outstanding characteristics.
Big Stretch Sashco caulk (see on Amazon) adheres very well, which is an essential feature. It will also stretch over time, rather than tear, thus avoiding any cracking we mentioned earlier. Furthermore, it’s effortless to use and apply. It comes in a 10.5-ounce or 29-ounce cans with efficient nozzle applicators. You can also apply it with your finger (protected with gloves, of course). As with other acoustic sealants, it doesn’t get hard while it dries, but it stays flexible.
Another great feature is that this acoustic sealant turns clear as it dries. That means that you can closely follow the progress you’re making. It also means you will quickly catch any potential omissions you’ve made in your sealing job.
You can use Big Stretch Sashco for soundproofing interior walls. Furthermore, it’s also useful for sealing windows, doors, baseboards, vents, etc. You can even use it for crown molding. However, it’s not designed to sustain prolonged exposure to water. Therefore, don’t use it for areas where it might be submerged in water, like in the pool or on the roof. That will diminish the curing. Big Stretch Sashco is:
- easy to apply even on delicate surfaces
- allows for materials to move, so the seal remains air and watertight
- paintable and easy to clean
Big Stretch Sashco caulk stretches really well. In fact, it extends more than 500% of its original size. That can’t be said for any other sealant. That’s also what mainly makes it the best product on the market. Stretch and elasticity of the caulk are vital. The material you’re treating it with might need to expand and contract to accommodate seasonal temperature changes.
2. St. Gobain Green Glue Noiseproofing Sealant
- dries quickly
- reduces noise transmission by 100 or more times
- doesn’t crack with age
Green Glue noiseproofing sealant (link to Amazon) is a non-hazardous acoustic caulk. It’s most significant advantage is that it practically has no odor at all.
This sealant driest down very quickly. It will seal the gaps and seams in mere minutes, while it takes about 48h for it to completely dry down. The primary use of this sealant is the sound deadening, and it is undeniably effective. When it cures, it will stay pliant to allow movements without cracking.
However, don’t confuse this product with the Green Glue noiseproofing compound (read where to use it). The compound is used for the entirety of your soundproofing project, while the sealant is more effective in filling in the gaps. Compared to the Sashco sealant, the Green Glue:
- doesn’t have the same quality of packaging
- elasticity and flexibility are not as distinct
- fewer color choices
This sealant will effectively dampen the sound and cut back on the sound transmission. However, it’s not as efficient as the Big Stretch Sashco acoustic caulk because it doesn’t have the same level of elasticity and stretch. Furthermore, the packaging and the quality of nozzle applicators seems to be a bit subpar, especially when compared with the Sashco acoustic sealant.
Moreover, St. Gobain Green Glue Noiseproofing Sealant is also more expensive than our first pick, the Sashco sealant. You can get a 28-ounce can for little over $30, while the 29-ounce Sashco sealant comes at half the price.
It’s also important to mention that the Sashco sealant comes in a variety of colors, which isn’t the case with the other two products we’re reviewing. You can choose the clear or the white one if you’re looking for simple solutions. Or, you can choose between limestone, black, gray, brown, tan, and more. Other sealants don’t have the same wide range of colors.
3. Franklin International Sound Sealant
- easy to apply
- mold and mildew resistant
- it takes time to dry down
- not as easy to paint over
This sound sealant is another excellent product, recommended for sound, air, and smoke sealing. Franklin International Sound Sealant (link to Amazon) is the cheapest of our three competitors. However, as with everything else, cheaper products tend to be less efficient. While this latex-based, non-flammable sealant is suitable in the reduction of sound transmission, it doesn’t have the same superb quality that Sashco offers.
That doesn’t mean it isn’t an adequate choice. It will take more time for it to dry down, and the stretch isn’t as incredible. That might prolong your soundproofing project. However, it is mold and mildew resistant and easy to apply. Then again, so are our two other contenders.
Franklin International Sound Sealant eliminates rattles in dry walls and plaster, and it also repairs cracks and seals gaps. However, beware of the packaging, as it can be of a lesser quality than others.
Keep in mind that all three sealants are prone to attracting dirt. That’s why it’s recommended that you paint over them. That is another reason why Big Stretch Sashco caulk is our top pick. It’s easy to paint over, and you don’t have to wait as long for it to dry down. We can’t say the same for the other two products. Out of the three, the Franklin International Sound Sealant takes the longest to dry, and even then it’s a bit difficult to paint over.
Where You Can Use Acoustic Caulk
As we already mentioned, acoustic caulk should be applied on gaps and seams. So, apply it wherever there is a joint between two materials, like a seam between drywall panels or between walls, floors, and ceilings. You can also use it around wiring, windows, and doors. Not only is it exceptionally efficient for the sealing of electrical boxes and outlets but it’s great for securing them as well. It can protect them from water and air.
You can use these sealants in commercial and residential construction. However, while acoustic caulk is superior to regular, silicone caulk because it allows movement, it’s not the best choice for underwater applications. If you need to seal something that will be exposed to water or submerged in it, you should go with the silicone caulk (see this Gorilla Silicone Sealant).
[elementor-template id=”6520″]
How to Use Acoustic Caulk
The application is relatively simple, no matter which acoustic sealant you choose. Here are the steps:
Time needed: 30 minutes
ACOUSTIC CAULK/SEALANT APPLICATION
- Prepare the Room
First, make sure you’re working in a well-ventilated area. Even though the odor is not as pungent in some acoustic sealants, it’s still an overpowering smell. Therefore, protect yourself.
- Clean the Drywall to Make the Sealant Adhere Better
Then make sure that the surface to which you’re applying the sealant is clean, as any debris, dirt, or even dust can interfere with curing and elasticity. A clean surface will make the sealant adhere better.
- Cut the Nozzle of the Sealant
Cut the nozzle of the tube to create a suitable hole. The size of the opening you cut should depend on the width of the gap that you are trying to seal. Use a utility knife, sharp knife or scissors to get a nice and smooth tip. Additionally, a lot of caulking guns come with a tip cutter built into the handle – you simply squeeze it and cut the tip.
TIP: Cut the tip at an angle to prevent the gun from stuttering and to get a smooth line (the reason is that every time you are caulking, you are holding the gun at an angle). - Use a Caulking Gun to Apply the Sealant
The tubes are tough to squeeze, so it is best to use a caulking gun to make the application easier. If you don’t own one already, you can get it online on Amazon. There is a variety of options, and some are better than the others. For example, when you use a standard caulking gun, and you release the handle, the pressure stays on even after releasing it. On the other hand, a dripless caulking gun (like this one) backs off when you release the trigger, which means it stops squeezing the caulking out the tube.
TIP: Use a painters tape to get straight lines.
TIP: Be quick when applying it because some of them cure fast, which can be counterproductive for those jobs that require fine finishing touches. - Smooth Over the Beads with a Caulking Tool
Finally, use a finger or one of many caulking tool kits (like this one) and smooth over the beads, so you get a nice-looking result. Just remember, the goal is to smooth the caulk and not to remove it.
- Let the Sealant Dry
Give it around 48 hours to dry before you start painting over.
RELATED POSTS: