When you’ve owned a car for a while, after a certain point, you might get the impression that the engine noise is getting louder. While there might be something wrong with the engine itself, more often than not, the real culprit is faulty hood insulation.
A hood liner or insulation can become worn and damaged after years of use, and some cars do not even come with this component included. If you believe the cause of your car’s excessive noise could be the lack of a proper sound-deadening element, perhaps you should consider making your own.
Hood insulation is typically made of a thin layer of material with sound-deadening properties. It is there to perform two important tasks. The first one is dampening the noise of your engine so that neither those in the car nor those walking outside would be disturbed. The other function is making the paint on the hood last longer, which some individuals find very important. Therefore, if you install your own DIY insulation, you will be able to customize both the appearance and the functionality so as to suit your own preferences.
With that said, take a look at this guide to DIY hood sound deadening and I guarantee you’ll get some creative ideas.

Best Under Hood Insulation
First of all, it is important to note that there are different types of underhood sound insulation that you can choose from. On top of choosing between different methods, you can even decide to combine them. These are the options at your disposal:
Sound Deadening Mats
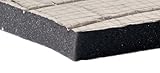
Many people use sound-deadening mats in their cars. Not only does that provide them with sound insulation, but most of these materials are also useful for thermal insulation. Therefore, a sound deadener is a simple and practical material of choice for any kind of DIY underhood insulation you might be making.

- Very sticky self-adhesive 80 mil automotive...
- Now the material is 1,5 times thicker that...
- Automotive self-adhesive insulation consists...
- Audio insulation Noico Pro has a special...
If you’re looking for a high-quality sound-deadening material you can purchase online, you may want to check out the Dynamat or Noico Sound Deadening Mats. The later product meets practically all the important criteria when it comes to soundproofing, and costs half the money compared to Dynamat. What’s more, it works with any surface, which means it’s equally useful for covering your car’s hood, doors, floor, and roof.
The Noico mat is very user-friendly and easy to install. What I especially like is the fact that it’s covered with a special embossing. This embossing indicates whether it’s properly set up or not. Your goal is to make the foil completely smooth, because then you know it’s set correctly. On top of that, it is full-weighted and has great self-adhesive properties.
Essentially, using this mat allows you to add more mass to whatever surface you’re applying it to. As you know, more mass equals less noise coming through that surface.
Hood Liner Insulation
While some people like to use sound deadeners, others prefer to opt for a hood liner. A high-quality hood liner provides you with a great way of making your ride cooler and quieter. These products are made specifically for the purpose of insulating the hood of your car.
Hood liners are self-adhesive and normally come in a default size, which you cut into the shape of your vehicle’s hood. An important advantage most hood liners have over sound deadeners is that they are thicker and they often have some heat insulation properties because of their proximity to the engine. However, such specifics always depend on the manufacturer. With that in mind, here are my two recommendations as far as hood liners are concerned:
Dynamat Hood Liner
Dynamat is a well-known manufacturer of car insulation materials and their hood liner offers you a good quality-price ratio. This hood liner can significantly muffle the noise your engine makes.

- Keeps Unwanted Engine Noise & Heat Out: The...
- Trusted by Car Lovers & Professionals Alike...
- Absorbs Noise: The Hoodliner's "Sound Soaker...
- Reflects Heat: The Hoodliner's 1 mm...
It is dense, but at the same time, very easy to apply. However, it is very important to take correct measurements prior to cutting it. Most hoods aren’t perfectly flat, but have concave and convex surfaces, instead. If applied correctly, the Dynamat hood liner holds very tightly. As far as looks are concerned, it has a shiny metallic appearance.
Fatmat Hood Liner
In terms of quality, the FatMat liner is very similar to the Dynamat. This hood liner is made of acoustic foam and reinforced with aluminum foil. As a result, it has some additional heat-resistant features, thanks to which it can protect the paint on your hood from the engine heat.
- Engine Compartment Acoustic/Thermal...
- Line Underside of Hood to Reduce Engine...
- Blocks Heat! Reinforced Aluminum Foil Facing...
- Easy Peel & Stick Installation. Pressure...
On top of that, the acoustic foam, which is a sound-absorbing material, will reduce the level of noise-induced vibrations coming from your engine. This product is covered in a strong peel-and-stick adhesive. As long as you install it correctly, it should provide you with instantly noticeable results.
Sound Deadeners and Hood Liners Combined
As mentioned before, instead of picking a single method, you can choose to combine them. This is the approach I would personally recommend to you. So, how exactly do you install a sound deadener together with a hood liner?
Fortunately, this process isn’t too difficult, since all these products are self-adhesive and DIY-friendly. First, you need to cut both of them into the appropriate shape. Once you’ve done that, remove the disposable release liner from the sound deadener and install it on the hood. Then, using the sound deadener as the base, install the hood liner on top of it. That way, you will benefit from the soundproofing qualities of both product types.
Keep in mind that, since these products go inside the hood, it is absolutely necessary to pick heat-resistant materials. Otherwise, the heat coming from your engine will quickly damage the insulation and it may even put you in danger. You should be especially careful with the sound deadeners since those are not necessarily made for this particular purpose.
How Much Insulation Material You’ll Need
The exact amount of the sound-deadening material you’ll need for your hood insulation depends on the size of your hood panel. In most cases, you won’t go wrong if you get a 60’’ x 60’’ sheet, because you should be able to cut that according to the shape of almost any hood.
However, some people prefer not to insulate the entire hood, but instead just the area around the engine itself. Although that will still make a difference in terms of noise levels, I personally recommend insulating the entire hood panel. Otherwise, a portion of the noise and the vibrations will continue to reach you. Still, if you decide to insulate only a part of your hood, you should measure that specific area to figure out how much material you’ll need. When you have the numbers, add an extra 5’’ to each value. That way, you’ll take into account the curves of the hood, as well as give yourself some room for error.
Prepare the Tools
The main tools you’ll need for setting up hood insulation are a pair of heavy scissors or a utility knife. You will need those to cut the material. Other than that, the materials are self-adhesive and shouldn’t be giving you trouble. Optionally, you may want to use a roller to make sure the liner is flat and even.
List of tools:
- Sound deadening mat and/or hood liner insulation
- Utility knife or sharp scissors
- Application Roller (Dynamat Dyna-Roller)
How to Install Hood Insulation
Follow these steps for DIY hood insulation Installation:
- Remove any existing hood insulation. If it doesn’t want to go off, use a flat knife to peel off the corners and proceed by hand. Be careful and don’t damage the paint.
- Clean off any grime and dirt sticking to the inside of the hood panel. The hood needs to be perfectly clean for the adhesive to work properly. Also put some plastic painter’s tarp on the floor if the area where you’re working isn’t clean.
- Outline the old insulation on the new material. Set the liner material on the ground, and then put the old insulation on top of it. Following that, outline the old insulation. Cut out the shapes according to the outline with a strong pair of scissors or a utility knife. (Watch the first video)
- Cut the insulation into shapes matching the hood. Instead of outlining the old insulation, you can cut the sheets into shapes matching the dips in your hood panel. Once you’ve covered all the dips, cut the rest of the material into strips to cover the convex borders between the dips. (The second video)
- Remove the protective film from the material. Make sure there is no debris sticking onto the adhesive surface.
- Apply the insulation to the inside of the hood panel. Be precise, once you’ve glued it down, it is going to stay firmly stuck. If you have any leftover material, apply more layers to get better results.
- Use a roller to make sure there are no creases and that you installed the hood insulation smoothly.
- As a finishing move, use a razor blade to trim down any protruding pieces.
VIDEO: Shapes matching the dips
The Benefits of Under Hood Insulation
There are many benefits to insulating the hood:
- Sound insulation absorbs a great portion of the vibrations coming from the engine bay area. It stops them from traveling through the car’s body into your cabin, thus making your ride quieter.
- Insulation keeps the temperature in the engine compartment more constant. Although the difference won’t be drastic, many users report that their hoods stopped overheating thanks to hood insulation.
- An insulating layer can prevent the paint from peeling off. Since temperatures under the hood can get very high, the paint on the hood can easily become damaged. Insulation is a great way to prevent that. That is why some cars come with pre-made hood insulators which prevent the metal parts from overheating.
- Insulation will stop the fire from spreading. If your engine happens to catch fire, hood insulation will prevent it from spreading to other parts of the car. It may even put it out and save your life.
Final Thoughts
Although some mats and hood liners can get pricey, setting up good hood insulation is a one-time investment. What’s important is that it can truly pay off in the long run.
You are likely using your car on a daily basis, and your ride should be comfortably cool and quiet. All it takes is a little bit of patience, skill, and enthusiasm to create a noticeable difference.
RELATED POSTS: