If you’ve ever tried to install sound deadening mats in your car, you know exactly how tricky that is. But what if it didn’t have to be? Some people may find applying sound deadening sprays easier.
There are several liquid sound deadening products on the market right now. You might not even know which one is worth getting. So, I thought I should say my piece on them as well.
Fair is fair: since I wrote so many articles comparing and reviewing the best sound deadening materials on the market, I might as well present some other options. To that end, I found the most well-known sound deadening sprays for cars and a few lesser-known alternatives. Aside from reviewing the products, I’ll also explain how you can apply them. But first, let’s see how spray deadeners compare to mats.
- Sound Deadening Sprays vs. Mats: Comparison
- Best Sound Deadening Sprays in 2023
- 1. LizardSkin 50115 Sound Control Ceramic Insulation
- 2. Boom Mat Spray-On Sound Deadener
- 3. 3M 03584 Rubberized Undercoating (Professional Grade)
- 4. Second Skin Spectrum Noise and Vibration Coating
- 5. Dupli-Color UC102 Professional Rubberized Undercoat and Sound Eliminator
- 6. Rust-Oleum 248656 Professional Grade Rubberized Undercoating Spray
- 7. Permatex 81833 Heavy Duty Rubberized Undercoating
- 8. GT Liquid-Damp and Dead Stop Liquid Deadener
- How to Apply Sound Deadening Sprays
- Are Sound Deadening Sprays Worth It?
Sound Deadening Sprays vs. Mats: Comparison
Mats Require Less Preparation
When installing sound deadening mats, there is no major preparation work that needs to be completed. You will just be cutting and fitting the mats into the right spots in your car. You will even be able to do part of now and then come back to it later if you choose to do so.
This is not the case when you’re making use of sound deadening sprays. Preparation is a huge process because you are going to need to completely strip and protect your interior ahead of time. If you fail to do this, then you will risk ruining it completely.
It’s important to note that people do not generally install the sprays themselves. Most people will hire professionals to do this for them which adds to the overall cost of the job. However, you can buy the products and attempt to do it yourself, as you will see in the following sections.

Sprays Are Easier to Install
Even the most effective sound deadening mats, like Dynamat or Noico, are pretty much a hassle to install. Dynamat, for all its advantages, is difficult to cut and position.
In general, the thing that makes sound deadening mats so effective is their thickness. However, that same thickness can make them unwieldy, to the point that some people even injure themselves trying to cut them. With a sound deadening spray, you don’t need to cut or position anything.
Aside from the cutting process, sound deadening mats also come with an adhesive layer that can be difficult to navigate. And though I’d recommend that you wear gloves when embarking on any automotive soundproofing project, most liquid deadeners are much easier to remove from the skin than glue is.
Even removing sound deadening mats from a car is similarly difficult, since their adhesive layer is built to last. Also, many mats oxidize if they get wet, which can damage the sheet metal of the car.
Also, unlike with sound deadening mats, a spray would allow you to completely, evenly, and easily cover the entirety of your car. While the process of installing mats can often take days to complete, a spray can be applied faster.
Use Sprays for Hard-to-Reach Spaces
Both of these products work great when it comes to reducing road noises. Sprays are actually able to provide the most coverage. This is going to allow you to cover the entire body of your car, even the ribs and the frame.
Mats still work well but there will be gaps. For the most part, they are going to provide great coverage to the body section of your car. However, they are not going to get the ribs and the frame as the spray will. You’ll still get good results but a spray may work even better in that case.
Overall Cost Depends on the Brand
Two gallons of liquid deadener will cover about 45 ft2 at 40 mils, or 1mm thickness. That amount of product typically goes for just under $150, so you can calculate how much product you’d need. For example, that price-to-quantity ratio makes sound deadening sprays cheaper than Dynamat but more expensive than Noico.
To be clear, both of these options are going to require a bit of an investment. Try to weigh the pros and cons of each of these options to see which one is best for you.
Best Sound Deadening Sprays in 2023
As I have previously mentioned, I’ve found eight sprays to choose from. So let’s see what each of them does before I explained how they’re applied.
1. LizardSkin 50115 Sound Control Ceramic Insulation
When I started looking into sound deadening sprays, Lizard Skin products were one of the first ones that popped up. The company actually makes three different spray products. You’re supposed to apply their sound control spray first, then the thermal insulation — and seal everything with a top coat.
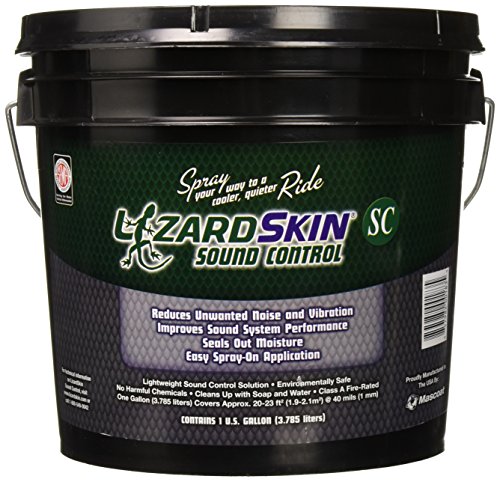
But I suppose the Sound Control spray should be enough on its own. For the sake of transparency, I should say that most of my insight into this product comes from user reviews and the manufacturer’s website. And, actually, the overwhelmingly positive user reviews were more helpful in determining the efficacy of this product.
Essentially, the only thing the manufacturer says about the way that this spray works is in the product name: it’s liquid ceramic insulation. As such, the spray should perform very well in hot conditions and the thin overlay it will leave on top of sheet metal in your car should be pretty scratch-resistant and waterproof as well.
The manufacturer also says that the spray is environmentally friendly, non-toxic and fire-resistant. By all accounts, Sound Control is lightweight but effective, but if you ever need to remove it, it comes off with soap and water. The spray is black, so you’ll actually be able to see it as you apply it, and if you decide to take it off.
As far as I can tell, this spray is as effective as some mats. The thin veil it leaves over the sheet metal prevents vibrations in a similar way a mat would. In addition, it’s also good at reducing outside noise as well, according to user reviews. Later, I’ll talk about how you can apply Lizard Skin Sound Control. But for now, we can move on to the other spray products.
2. Boom Mat Spray-On Sound Deadener
The Boom Mat Spray-On is another heat-resistant sound deadener. According to the product packaging, it eliminates road noise, enhances audio performance, and dampens vibrations. Of course, these are all claims I was familiar with: I’ve seen them often enough when reviewing sound deadening mats.
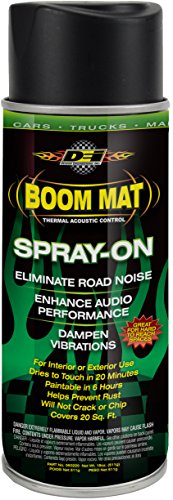
Still, if the product is anything like the previous one, it should work as well. A single 18 ounce can is supposedly enough to cover about 20 ft2, which is definitely a bolder claim than the gallon per 20 ft2 we’ve previously seen. Will such a thin film of the stuff work?
According to user reviews, yes — this spray should decrease noise and vibrations. Besides, you can also layer the product on top of itself to get the most from it. Still, I don’t believe that it could be as effective as a mat, or even Lizard Skin.
Customers had also complained of a strong rubbery odor, which is to be expected, since it’s a rubber-based product. Also, asphalt-based mats emit a similar scent as well.
The cost of this product remains consistent with my earlier estimate — 2 gallons should still cost under $150. However, this product is available in cans of 18 ounces, so it may seem cheaper than the liquid sound deadeners you can find in buckets.
The fact that the product is in a pressurized can, and the fact that it emits a strong scent is concerning. The manufacturer thinks so too — they included a “flammable vapor” warning on the can.
3. 3M 03584 Rubberized Undercoating (Professional Grade)
Much like the previous spray-on sound deadener, 3M Undercoating comes in a can. However, it’s much more modest about the surface area the 16 ounces of the product can cover — only about 6 ft2 at most. The price is still consistent with my original estimate.
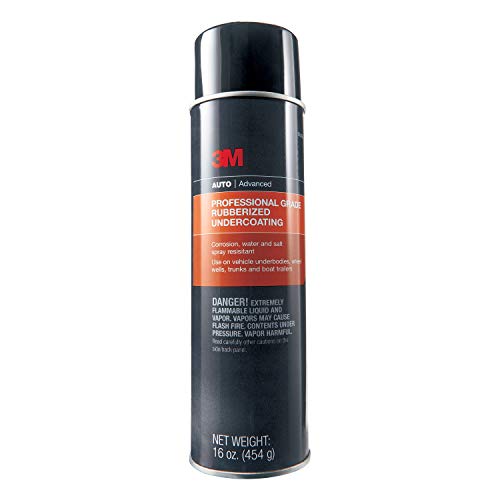
Still, just because the manufacturer accurately predicted the area their product can cover doesn’t mean that it’s without its flaws. Firstly, just like the previous spray, it will definitely be less effective than most mats. Also, like the previous product, it may emit a certain odor since it is asphalt-based.
I should mention that the primary purpose of this spray isn’t sound deadening at all. Rather, it mostly promises to protect your vehicle from rust, corrosion, and even salt during winter. However, you’ll need to be careful how you apply these waterproof sprays if you’re really looking to prevent rusting. I’ll explain how you should prep the surface you’re covering in the following section of this article.
Also, unlike sprays like Lizard Skin, this 3M product seems pretty difficult to get rid of. So protective gear might be in order when you get around to applying it. But this is also something I’ll discuss later in the article. For now, I’ve got one last product to review.
4. Second Skin Spectrum Noise and Vibration Coating
Second Skin’s Spectrum Noise and Vibration Coating is probably the most interesting product on my list. The water-based, viscoelastic polymer formula was specially developed to cling onto metal surfaces and stop them from vibrating. Yes, you read that right. The coating neither absorbs nor blocks sound but rather dampens its vibrations — which can be just as effective in reducing unwanted noise.
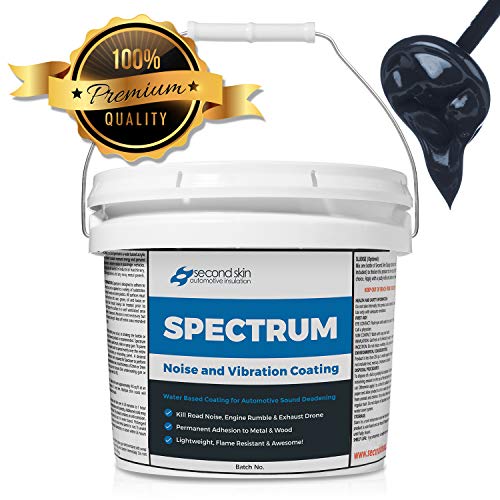
Spectrum also helps stop thermal transfer on metal surfaces in cars and all other types of vehicles. You know how much I love multi-use products, and this one is right up my alley. It also works on HVAC ducts, subwoofer boxes, and warehouse carts. What’s more, the formula is heat-proof up to 400 °F, so you can safely use it on your firewall too.
While Spectrum was specially designed for use on metal, you can also apply it onto most other materials. The only exceptions are plastic and glossy surfaces without a primer.
The product is also scent-free and water-, rust-, and fireproof. Perhaps most importantly, Spectrum is non-toxic and health- and safety-tested. However, you need to be careful not to get the product on your clothes or upholstery. You might find it difficult to get the stains out later.
To apply Spectrum, use a spray gun, an air compressor, a paintbrush, or a roller – it’s basically a sound deadening paint. For best results, you want to apply a couple of coats with an overall thickness of 2–3 mm but no more than 5 mm. To clean the surface, just use a damp cloth.
5. Dupli-Color UC102 Professional Rubberized Undercoat and Sound Eliminator
The Dupli-Color Professional Rubberized Undercoat and Sound Eliminator seems to be another great option for when you need a sound-deadening product that can also protect your car from the daily wear and tear.
You can apply the rubberized formula pretty much anywhere on your vehicle. Think doors, gas tanks, wheel wells, floor pans, quarter panels, weld joints, frames, supports, and more. The coating is moisture-resistant, helps protect metal surfaces from corrosion, reduces vibrations, and creates an effective sound barrier.
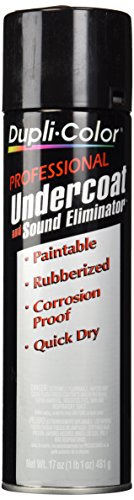
The Dupli-Color Undercoat works on both metal and plastic. However, you need to degrease the area and let it dry before applying the product.
Note that the solution dries to a textured, matte black finish. So, if you are looking to achieve a smooth and/or shiny surface, this might not be the right product for you.
Another thing to bear in mind is that the item is not currently available for sale in Catalina Island. The product is not heat-resistant either.
On the flip side, the Dupli-Color Undercoat has a quick-dry formula. It should be dry to the touch within about an hour after application. Any coated surfaces will be safe to handle within a couple of hours.
6. Rust-Oleum 248656 Professional Grade Rubberized Undercoating Spray
Are you looking for a dual-use product that can both reduce unwanted noise in your car and protect it from wear and tear? The Rust-Oleum Professional Grade Undercoating Spray might be your best bet. This product can help prevent rust and corrosion from salt, water, chemicals, and the elements.
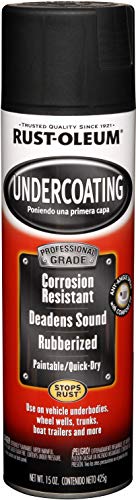
The formula was specially developed to protect the metal underbodies of all types of vehicles. Chances are that you don’t pay a lot of attention to your car’s undercarriage, wheel wells, or quarter panels. However, it is essential that you keep them in good condition. That prolongs the lifespan of your vehicle and helps ensure your safety on the road.
This spray comes with a wide tip that allows you to spray from any angle. It also seems fairly simple to use. According to the manufacturer’s specifications, the product should be dry to the touch in about an hour. A single can should be enough to cover up to 10–15 square feet.
7. Permatex 81833 Heavy Duty Rubberized Undercoating
The Permatex Heavy Duty Rubberized Undercoating is another multipurpose spray that can help reduce unwanted noise as well as insulate, seal, and protect your vehicle. You can also apply the product pretty much anywhere around the house, including the roof, gutters, and drain systems. You can even use it for pruning trees!
According to the manufacturer, the rubberized formula ensures maximum durability and enhanced sealing properties.
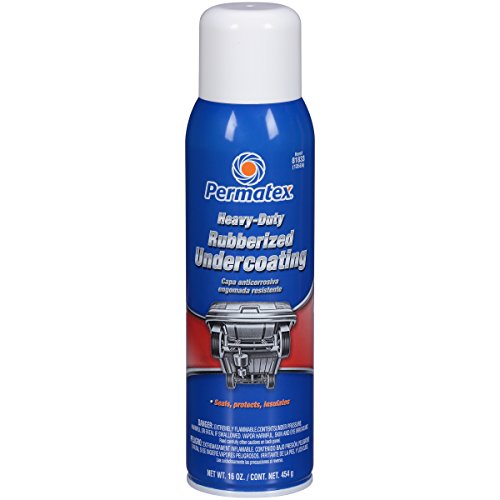
For the sake of transparency, I should also mention that I came across a few consumer reviews where people said that the coating looked porous. Apparently, however, the coating is not porous and is, in fact, water-resistant. It’s just that as the propellant expands and hits the surface, it creates a type of foam that gives it its distinctive porous look.
To get the best results, you want to apply the product on a completely clean and dry surface. Note that you need to shake the can for at least two minutes after loosening the agitator ball. That sounds somewhat annoying, but if you skip that part, you apparently risk having the ball stick to the bottom of the can.
Make sure to apply two or more layers, letting each dry for at least 15 to 20 minutes before applying the next one. It’s also crucial that you do not apply the product at temperatures below 50 °F and within 10 inches or less from the exhaust system. To clean the finished surface, use kerosene or mineral spirits.
8. GT Liquid-Damp and Dead Stop Liquid Deadener
During my research, I also came across two more liquid sound deadeners I won’t dedicate too much space to. I decided to skip them mostly because they’re not technically spray products.
- The GT Sound Control Liqui-Damp looks like a pretty good sound deadener, and it was specifically made for automotive soundproofing. However, I can’t count it as a spray because you’re supposed to apply it with a brush. The brush, along with a degreaser, latex gloves, and some extras, come with the gallon bucket of product which can cover 75 ft2. The product resembles drywall mud, so you should thin out the product before applying it.
- The Dead Stop Liquid Sound Deadener is a similarly thick product. So you can apply it straight from the gallon container, or thin it out with water. I decided to skip it not only because you can’t spray it on but also because I could only find it on GT Sound Control’s website, rather than on a regular online retailer site. However, these two still cost about the same per gallon as the other liquid sound deadeners on my list.
Now let’s see how you can apply the spray sound deadeners before I wrap this article up.

How to Apply Sound Deadening Sprays
Step 1: Protect the Car
Just like when you want to install sound deadening mats, you’re going to need to get to the sheet metal of the car. For that, I’m going to point you to my article on soundproofing doors and under the hood. The doors can be especially tricky to take apart, so I advise you to do your research beforehand. You’ll also have to take off the headliner and get rid of the seats and carpeting if you intend to go all in.
Step 2: Clean the Surface
Once you’re down to the bare metal, you’ll want to make sure that it’s clean and rust-free. All of these sprays are going to waterproof your car to some extent, which can actually be detrimental if the metal is already rusted.
If you’ve got some surface rust, you can just sand it off. In fact, you should sand down the whole surface you’re working on. But if you’ve got more rust damage, you may need to treat it with a rust encapsulator.
Once you’ve sanded the surface, clean it off with a clean, dry rag. If there’s some oil or grease, you can even use alcohol or a degreasing agent.
Step 3: Prepare the Spray and Tools
Alright, these instructions are pretty basic. Wear clothes you don’t care about, lay down some protection, and cover the steering wheel if you’re going to be spraying the roof. If you’re working with one of the products that comes in a can, you should consider wearing a face mask, and perhaps a hat.
However, if you’re applying something like the Lizard Skin Sound Control, you should get your spray gun and a mixer. If you don’t have them, the company sells their own kit which includes a spray nozzle, a canister, a mixing drill tip, and a wet mil gauge. As I have previously mentioned, Lizard Skin products are water-soluble. So you’ll be able to clean the spray gun off after you finish.

- Fit Type: Vehicle Specific
- Product Type: Auto Accessory
- Package Dimensions: 44.0 L X 11.8 H X 34.0 W...
- Item Package Weight:3.791 Pounds
Once you’ve got everything, you need to mix the Lizard Skin before applying. Put the bucket on cardboard or plastic and open it. Plug in your mixing drill bit and put the drill in reverse, then slowly mix the contents of the bucket for a few minutes.
When you are pouring the Sound Control into the spray gun canister, make sure to pour it towards the label if you don’t want it to drip on the instructions on the back of the bucket.
Step 4: Apply the Sound Deadening Spray
Again, if you’re using the pressurized canned sprays, you’ll have less work. Put your mask on and keep the can at least 8 inches away from the surface you’re spraying. The spray should be dry after about 20 minutes, so you’ll be able to reapply it at that point. After about 6 hours, you’ll even be able to paint over it, or set it with a polish. However, that’s not necessary.
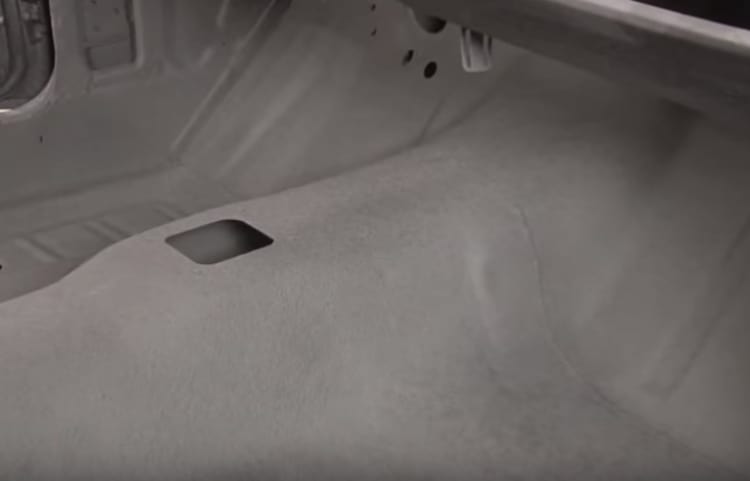
If you’re using Lizard Skin or a similar product, plug in your spray gun and get to work. Expect to see a splatter texture since the gray liquid is much more substantial than the stuff that comes out of a can. Spray the Sound Control evenly across the surface.
Step 5: Spray Another Layer
Once you finish, you can check how deep your layer is with the wet mil gauge or just a piece of wire. You want to get your first layer about 20 mils thick. After 30 minutes to an hour, or when the layer is dry to the touch, you can reapply another 20 mils. And once that’s done, you can even put Lizard Skin’s thermal insulation on top.
Both products are gray when wet but closer to black when dry, and they both have some texture. If you don’t like that, you could probably top them with a primer, paint, or a polish.
Step 6: Put Everything Back
Take all the steps you took to disassemble the car to return everything where it belongs.
Are Sound Deadening Sprays Worth It?
Well, I’ve made up my mind. Sound deadening sprays can be a great and easy solution. They certainly take less effort to apply than sound deadening mats. However, I do have a few gripes:
- Firstly, manufacturers are going to have to step it up in a big way. There can’t be only three serious contenders on the market.
- Secondly, spray deadeners have a reputation for chipping, which is simply unacceptable from a product which is supposed to fend off rust.
- Also, the rubbery scent on some of these must be fixed. As of right now, Lizard Skin is the only one of the three products I have mentioned which doesn’t have a smell. However, it’s the hardest one to apply, though still comparatively easier than installing a mat.
Once there are more products on the market, I’m sure companies will find a way to solve these issues. And then, we’ll have ourselves a great way to soundproof our vehicles easily and cheaply.
RELATED POSTS: