Most people will tell you that having carpeted floors is just about the best thing you can choose to ensure the acoustic quality inside of a room. That’s only one of many precautions audio production studios take to ensure that there is no echo on their recordings. But can wall-to-wall carpets make our homes more soundproof? If not, is there a way to soundproof a carpeted floor?
Today is the day you learn the conclusive answers to those questions. Moreover, you’ll see exactly how you can reduce the noise transfer in any carpeted room. There are two ways to go about it, and we’ll discuss both later on. Basically, you could either add layers on top of the carpet or lift it in order to apply padding underneath it.
And if you’re wondering which padding you could use for that purpose, you’ll find several examples following the guide below. But first, let’s talk about how effective carpeted floors are in terms of soundproofing.
- Are Carpeted Floors Good for Soundproofing?
- How to Soundproof a Carpeted Floor (Step-by-Step)
- 1. Get Your Tools
- 2. Remove the Floor Transitions and the Wall Baseboards
- 3. Carefully Detach the Carpet From the Tack Strip
- 4. Remove the Existing Carpet Padding
- 5. Check for Subfloor Squeaks
- 6. Optional: Lay Down Some MLV
- 7. Unroll the Carpet Underlay
- 8. Stretch the Carpet Back Out to the Wall
- 9. Put the Trim Back in and Wrap It Up
- Best Soundproof Carpet Underlays and Padding
- Can Stacking Rugs on Top of a Carpet Help With Soundproofing?
- A Few Final Reminders
Are Carpeted Floors Good for Soundproofing?
Carpets are less resonant than many of the other kinds of flooring you might think of installing. They’re certainly less echoey than laminate or ceramic tiles. But can they prevent noise from passing through the floor? The short answer is: yes — but you’ll need a good underlay.
One thing you need to consider when soundproofing your floors is the kind of noise you’ll have to deal with. On the one hand, you have airborne noise, which is how we perceive most kinds of sound. If air can pass through your floor, it’s probably because there are cracks in it that lead straight to the room below. However, it’s worth noting that most floors have multiple layers of materials stacked on top of each other, between the ceiling drywall and the flooring.
So airborne noise isn’t much of a problem — unless the people in the room under you can actually understand the words you’re saying when you speak at a normal volume. If they can, you might want to look into soundproofing your floors from the inside out.
On the other hand, you have impact noise, which is transferred through the structure of the building. Unless you completely decouple — or separate — your subfloor from the floor joists, your footsteps will almost certainly be heard in the room below. Worse still, they’ll be felt, as every movement overhead will vibrate through the building. You wouldn’t want to take to tiptoeing around your own home, would you?
But while carpeting can significantly improve the noise blocking capacity of a floor, not every carpeted surface is equally effective. So in the remainder of this guide, we’re going to talk about some of the ways you could reinforce your carpeting.

How to Soundproof a Carpeted Floor (Step-by-Step)
Most people balk at the thought of lifting their carefully stretched carpeting. However, this guide will prove exactly how easy it is to get it done. As long as you have the right tools, the whole project should be easy enough.
1. Get Your Tools
Some people claim that stripping and installing wall-to-wall carpeting only requires three tools: a utility knife, a stair tool, and a carpet stretcher. But there’s other equipment you’ll need for this job — like your underlayment of choice. Additionally, you might need a crowbar and some protective gear as well.
Since you’ll be spending a lot of time on your knees, it couldn’t hurt to get yourself anti-slip knee pads. You could also protect your knees with rolled-up towels or blankets, with the obvious disadvantage of having to move them as you work. While you’re at it, you might want to fish out your work gloves, especially if you end up having to pry the old carpet underlayment up from the subfloor.
Speaking of prying, you’ll almost certainly need a prybar or scrapers of different sizes. If you find that your carpet was installed before the wall baseboards, you’ll have to remove them before starting the project. And you won’t be able to do it without prying tools and possibly a hammer as well.

- Set Contents: (1) 5-1/2", (1) 7-1/4" and...
- Feature a nail puller, razor sharp scraper...
- Angled edge is ideal for pulling apart walls...
- Razor-sharp scraper edge is perfect for...
To remove and reinstall the carpet without damaging it, you’ll need a carpet stretcher. If you have a big budget, you can buy or rent a power stretcher. Those are significantly easier to use than their cheaper relatives — manual kick stretches, which can also wreak havoc on your knees. You can see what that first tool looks like in this video, but this guide will mostly reference the cheaper instrument.
After you lay down your new underlay and restretch the carpet, you’ll need to press it back onto the tack strip with a stair tool. But before we get too far ahead of ourselves — let’s start by taking off any floor transitions and baseboards.
2. Remove the Floor Transitions and the Wall Baseboards
Before you strip your carpet, check if it’s stuck under the baseboard trims and floor transitions. If it isn’t simply tucked in at the edges, you’ll have to pry those pieces off carefully. Alternatively, if you’re planning to replace them with new parts, you’ll be able to cut or break them off.
To begin with, let’s start with the thresholds or the floor transition pieces. If you want to completely take off the carpet, you’ll have to pry those bits off. They’re usually glued on, so you should be able to stick your pry bar under the floor gap and gently nudge it off one inch at a time.
If you had applied caulk between the threshold and the floor, start by running a utility knife horizontally along that line. After you break that seal, prying the piece off should be easier.
You’ll have to be even more careful with the wall trim if you want to avoid damaging the drywall. Since baseboards are almost always nailed into the wall, they can be a bit more stubborn.
Furthermore, their length makes them easier to crack if you’re not careful about the way you distribute your prying force. You can avoid that by using thinner crowbars, to begin with. Once the trim starts coming off, jimmy it off with the help of a small board, as shown here.
3. Carefully Detach the Carpet From the Tack Strip
If you weren’t planning on putting your carpet back in place, you would simply cut it with a utility knife and rip it off from the tack strip. But if you’re trying to preserve the integrity of the carpet, you’ll have to detach it by stretching it off the tacks.
Even if you have never installed wall-to-wall carpeting, you should know what holds it all together. Unless the carpet was nailed into the sides of the room, it’s probably being held there by a tack strip. That part runs along the edges of the room, about an inch or two away from the wall.
The strip of wood has pins sticking out from it at a 45-degree angle, facing the wall. So when you stretch the carpet toward the wall and release the pressure, it remains stuck on the tack strip. Therefore, there’s no way to lift the carpet directly off the strip without damaging the bottom side.
However, if you stretch the carpet once again toward the wall, and keep it elevated as you release the pressure, it’ll come right off without a hitch. Simply place whichever stretching instrument you’ve got about five inches away from the wall, and push the carpet over.
Try not to reach for the edge with your fingers. Remember, those tacks are pointed toward the wall, so you could seriously hurt yourself. Still, you could use your pry bar to gently pull the carpet away before moving a few inches to the side to continue stretching it off the strip.
4. Remove the Existing Carpet Padding
Most carpeted surfaces have some kind of padding right below that surface level. However, if your floor is leaking sound, the one you have has probably deteriorated over time. To prepare the floor for the new carpet underlay, you’ll first have to strip the old one.
Of course, since it’s likely made of flimsy foam, that should be easy enough to do. You won’t even need to hang on to the material, so you could simply rip it off and stuff it in a garbage bag.
After you remove the largest sections of the padding, you’ll still have to deal with the staples in the subfloor. It’s best to remove them now, rather than later. You can use your pry bar or take a more targeted approach with a pair of pliers.
Once you finish, sweep up the staples along with any remaining underlay residue and toss it all out. Lastly, mop the whole floor in preparation for the new carpet underlay.

5. Check for Subfloor Squeaks
If you want to be particularly thorough, now is the time to check your subfloor for squeaks. Go around the room, taking tiny steps and shifting your weight by bouncing on your knees. If you find a squeak, you’ll have to nail down the subfloor — it’s as easy as that!
Basically, wherever you hear a squeak, you’ll want to find the nearest screws that are holding the subfloor to the floor joists below. Get some long nails and drive them into the subfloor less than an inch away from those screws. If you manage to hit the joist below, that should eliminate the squeaking.
6. Optional: Lay Down Some MLV
Before you go in with softer padding, you should consider laying mass loaded vinyl directly on top of your subfloor. If you’re worried about airborne noise, MLV can thicken up your floor. So even if you didn’t have insulation under the subfloor, it wouldn’t matter.
Mass-loaded vinyl is a fantastic soundproofing material, whether you want to use it under or over flooring surfaces, or even under the subfloor. It can also help you soundproof walls, ceilings — you name it, you can probably attach MLV to it. In this case, the dense material would really make your floor more impenetrable to airborne noise as well as absorb any impact noise your footsteps might produce.
If you decide to include MLV, you could order just enough to cover the entire surface of your floor. You’ll probably have to let the material settle for a few hours after you roll it out. When it’s as flat as it can be, use double-sided carpeting tape or nail the edges into the subfloor.
If you end up topping it off with another carpet underlay, you probably won’t need to connect the MLV pieces with tape. However, if you want to use MLV on its own, tape it down to prevent airborne noise from slipping through the floor. You could even use a professional soundproofing tape like Dynatape (find out more about the Dynamat company here).
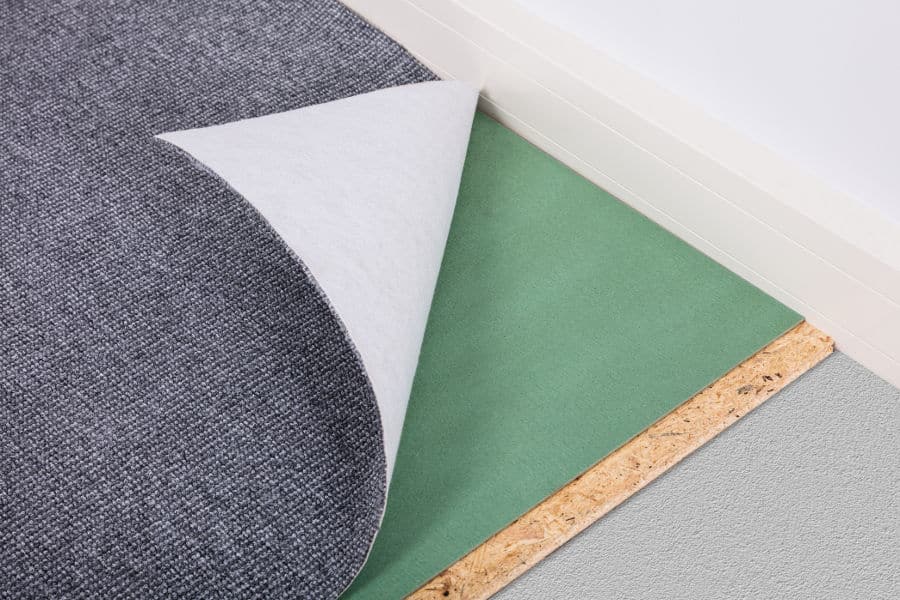
7. Unroll the Carpet Underlay
Depending on the kind of carpet underlay you end up using, you’ll either have to nail or staple it to the subfloor or glue it down. Adhesives would certainly make it easier to remove the next time you need a replacement. Still, glue would certainly hold it down well enough.
Unlike MLV, most carpeting underlayment products are thin enough to unroll and install right away. Unroll one length, cut it off, and repeat until the whole floor is covered. Then, either apply the adhesive or nail it down, and follow it up by applying duct tape all along the seams. After you’ve done that, you’ll be ready to bring in the carpet and stretch it out again.
8. Stretch the Carpet Back Out to the Wall
If you’re working in a small enough room, a knee kick stretcher may be all you need to reattach the carpeting to the tack strip. But depending on the circumstances, you might have to rent a power stretcher.
When you want to start stretching your carpet back over the tack strip, pick the easiest side first. Place your carpet stretcher in the middle of that side several inches away from the wall.
If you have a knee kick stretcher, get on your knees, and hold the stretcher with your dominant hand. You’ll also be slamming your dominant leg into the padded part. That will hook the pins on the head of the stretcher into the carpet, bringing it closer to the wall — and, more importantly, the tack strip. At that point, you should run your stair tool over the carpet to secure it to the tack strip.
After that first stretch, move a foot or so to one side and repeat the process. Angle the stretcher slightly toward the corner of the room to remove any wrinkles that might pop up in the middle of the room. Again, smooth over the edge of the carpet to attach it to the tack strip. But again, not with your hands — use the stair tool!
Once you reach the corner, repeat the process on the other side of the room. So if you started in the middle and moved right, go back to the middle and move left. When you finish doing that wall, go to the one across from it, then finish up the two remaining ones. If you can’t kneel and kick at the stretcher for long periods, try this jumping technique.
9. Put the Trim Back in and Wrap It Up
After you have the carpet firmly attached to the tack strip or stapled down, you’ll need to wrap everything up. Reattach the baseboards and put in the transition pieces if you had to take them off earlier. Lastly, tuck the frayed edges of the carpet under those trim pieces.
If you had removed any thresholds at the beginning of this project, you’d have to caulk them back in place. The same goes for the baseboards — but you’ll probably have to nail them back in and patch them up with wood putty. After those are all back in place, you’ll use the stair tool to tuck the carpet under that trim.
Of course, if you had installed completely new carpeting, you’ll probably have some excess material to cut off first. You could either do that with a utility knife or a special carpet edge cutting tool. But these instructions are more for the people who are just going to put their old carpeting back in.
Best Soundproof Carpet Underlays and Padding
When you start looking for carpet padding, you’ll quickly notice that most of the flooring underlays on the market are technically only compatible with hardwood floors, linoleum, vinyl, or tiles. There’s practically no mention of carpeting! However, in my previous research, I’ve found at least one underlayment that should work for carpeted surfaces as well.

- For use under laminate and hardwood flooring
- Approved for floors with a pre-attached pad...
- Moisture barrier with Dri-Wick technology...
- Medium-size 100 sq ft roll is ideal for...
The QuietWalk felt underlayment is excellent at sound and impact absorption. Even though felt isn’t particularly moisture-resistant, one side of the material has a handy vapor barrier. That should keep any potential spills away from the core of the underlayment. The product is similar to the one used in this video, you can use it for your carpet as well.
On the other hand, if you’re looking for something more eco-friendly, you might consider using cork underlayment. As a relatively porous material, it might let some airborne noise slip through the cracks. However, you could prevent that by combining it with MLV. Alternatively, you might use this quarter-inch thick, recycled rubber underlay.
Can Stacking Rugs on Top of a Carpet Help With Soundproofing?
If you don’t want to remove your carpeting, there are ways to soundproof your floor without taking such drastic measures. For example, you can always put more carpets or rugs on top of a carpeted area.

- SPECIFICALLY DESIGNED FOR CARPETING: the...
- LESS SHIFTING AND BUNCHING: rug pad for...
- HOW IT WORKS: simply position rug pad in...
- LOW PROFILE DESIGN: pad's low profile design...
Now, you might think that would look a bit clunky, but there are ways to make it work. Magic Stop’s non-slip rug pad and Gorilla Grip’s gripper pad can help you pull off the look. And you could always use something thicker like the quarter-inch felt cushioning. These products will allow you to stack rugs on carpets without worrying about any wrinkles or bubbling.
And if you feel like your floor needs a bit more help, you could use MLV as your rug underlay. You can even make it more sturdy by attaching rug grippers to the top and bottom of the vinyl.
A Few Final Reminders
As you can see, soundproofing carpeted floors doesn’t have to be a particularly taxing project. But that doesn’t mean that you should underestimate the amount of time you’ll need to complete it! Make sure you set aside at least a day or maybe even two and work at your own pace.
More importantly, remember to protect your knees and hands while you strip the carpet. It’ll spare you a few days of pain.
RELATED POSTS: