Is there anything worse than having your movie night spoiled by the persistent rattling of a fan? If you turn it off, you’ll suffocate — or at the very least start sweating profusely. But if you leave it on, you won’t be able to hear your movie — it’s a real conundrum! Still, I’ve found that doing some basic maintenance before making my popcorn and dimming the lights can make a difference. So let’s talk about the seven ways you could make a room fan quieter anytime it starts causing trouble.
Before we dive into solutions, let’s talk about why your fan may be noisier than you remember it being. As always, finding the reason should give you a head start on solving the problem.

Why Are Fans So Noisy?
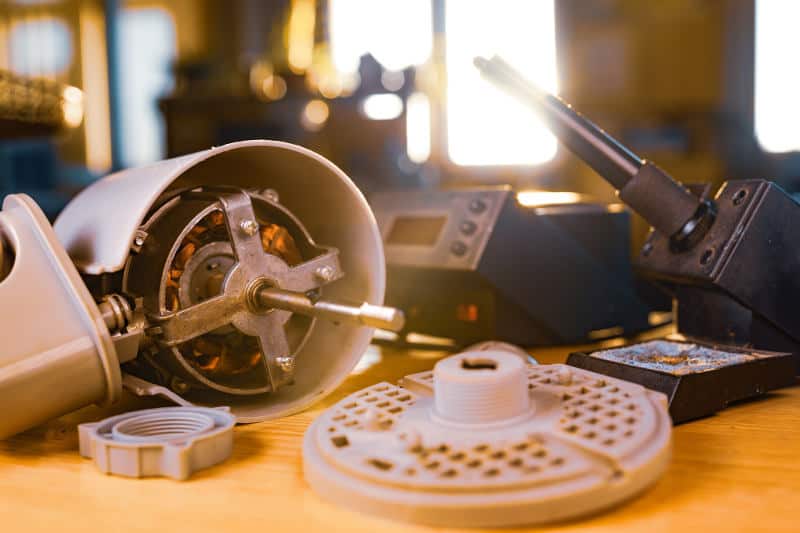
Even though fans come in all shapes and sizes, they all tend to have the same parts. They all have rotating blades that are attached to a motor and encased in a grille of some sort. When one of those parts isn’t secure, your fan might start making all sorts of noises. Still, in my experience, the potential causes of the noise can be summed up in only a few lines:
- The shape of the fan has changed in storage (or because the fan fell over one too many times)
- There are loose parts that rattle against each other as the blades spin
- The motor (or another moving part of the device) hasn’t been oiled in a while
- The lint on the blades is disrupting the balance of the fan or hitting the cage when the blades are spinning
- You put the fan on uneven ground, causing it to wobble and vibrate against the floor
Generally, it’s pretty easy to establish the cause of the noise just by looking at the fan. However, if you don’t spot the problem, you can go through all of the solutions I’m about to present.
Ways to Make a Fan Quieter
Now that you have a good idea of what’s causing the racket, fixing it should only take a few minutes. Most of the solutions I’m about to share don’t even require you to have any training or equipment whatsoever. In any case, your room fan will be easier to reach than a ceiling fan.
Before you start, grab a damp rag and a screwdriver — you’ll almost certainly need them. Any additional tools should be easy enough to get your hands on if you end up needing them.
1. Check If the Floor Under the Fan Is Level
If your fan started making noises as soon as you set it down and turned it on, you might find the culprit if you look down. Uneven ground is one of the most common reasons fans start rattling. If the base of a fan isn’t completely level, the device can start to wobble as the blades spin, which can create quite a bit of noise.
Fortunately, there’s a simple solution to this problem. Simply move your fan elsewhere — you can use a level ruler like this one to make sure the new location checks out. If the noise doesn’t persist when you put the fan somewhere else, you won’t have to continue going down this list.
Even if you can’t find an inch of level ground in your home, don’t despair. There are other ways to even out the base of the fan. You can use a folded piece of paper, a large book, or even a carpet — whatever works!
2. Make Sure Your Fan Is Clean
After a long winter in the basement, you shouldn’t be surprised if your fan starts making low rattling noises when you turn it on. The dust bunnies that collect along the edges of the blades can sometimes be heavy enough to disrupt the rotation of the fan.
If you have a regular pedestal or box fan, you’ll just need to lift the closures of the cage that covers the blades. Tower fans may have grilles that are screwed into the case, in which case you’ll get to showcase your “lefty loosey” technique. Once you get inside the fan, hold the blades with one hand while you pass a damp rag over both sides. When you finish, you can rinse the rag and repeat the process, passing it over the rest of the fan, including the grilles.
Sometimes, simply cleaning the fan will be enough to prevent it from making more noise. But remember to cover your fan with a bag the next time you set it aside for the season.
3. Tighten Any Loose Screws and Bolts
After you clean the fan and before you put everything back, you might also want to check for loose parts. If you discover a screw or a bolt that doesn’t feel as secure as it should be, tighten it with a screwdriver or a wrench.
Additionally, if you happen to find a broken part of the housing or anything you can’t fix with a screw, use duct tape. After you fasten everything, turn the fan on to see if anything is still rattling. If you still hear the same noise, move on to the next step.
4. Align the Blades
Over time and after tens of thousands of rotations, the plastic blades of your fan may warp. The misshapen blades can affect the overall balance of the fan, causing it to wobble and vibrate against the floor. And that’s not even mentioning the grinding sounds you might hear as the blade hit the surrounding cage.
To diagnose this problem, you’ll need to take out the blade hub and put it on a table. You might be able to see the different heights of the blades. However, if the difference isn’t noticeable, you can also use a measuring tape or a ruler to make sure the blades are even.
If they’re not, you’ll simply bend the blade that sticks out back into position. Then, put the blade hub back where you found it, secure it, and turn the fan on. If the noise is gone, you’ve just eliminated the cause.
5. Find Out If the Cushions Need to Be Replaced
When you lift the blade hub from the motor pin, you might see some padding that’s supposed to separate the blades from the motor. Nowadays, most fans have that separation built into the back of the blade hub itself. However, you may own a fan that has a bit of foam or felt back there.
If you notice that the cushions aren’t what they should be, you can easily replace them. Head over to your local hardware store and see if the folks there have something you could use. If they don’t have any suggestions, I’d recommend using a piece of thick felt or foam, or even cardboard, to pad the area. You’ll probably have to cut a hole in the middle and push the material over the pin before putting the blades back.
6. Pad the Space Between the Cage Halves
While you’re already using padding materials, you might as well check if there are other places you ought to use them in. For one, pedestal fan grilles can get warped in a way that prevents the two halves from closing properly. If you can’t put the closures back over both sides of the cage, the two halves will probably vibrate against each other. And, as we all know from many prior experiences, the sound of metal hitting metal isn’t particularly pleasant.
Still, I have a solution. If you can discover exactly where the parts are rattling against each other, you can target that area with your padding materials. Slide some felt between the cage parts and secure it with tape. I’ve certainly done this plenty of times myself.
However, I only suggest implementing this solution as a temporary measure while you look for a new fan. I just don’t see why you should live with a haphazardly put-together Frankenfan if you don’t have to.
7. Oil the Motor
The issue of oiling your fan’s motor isn’t one that will come up particularly often. In fact, most of the newer fans don’t need to be oiled. However, some pedestal fans still need to be oiled every once in a while.
Generally, you shouldn’t use just any oil on your fan. If you have SAE 20 non-detergent oil on hand, you can use that. If you end up having to order the oil, you can use something like the Liquid Bearings synthetic fan oil.
When you look at your fan motor, you should be able to locate the oil ports. Those are the small openings through which you’ll need to put in the oil. Still, you don’t want to overdo it! A drop or two will do, and only about once per year.
On the other hand, if your fan doesn’t even have oil ports, or you’re unable to locate them, you can simply spray the pin that holds the blades. However, if you believe that your fan needs more lubrication than that, I’d say it’s time for a new one.
Additional Tips for Making Your Fan Quieter
Aside from keeping your fan clean and secure, there are some other ways you can lower the volume of the noise it produces. For one, you could stop using the oscillating feature. As much as you may like it, it’s one more moving part that has the potential to make noise.
Furthermore, you can also turn the speed of the blade rotation all the way down. If the slowest speed isn’t strong enough to keep your room cool, turn on the strongest setting while you’re out of the room. When you come back into the room, you can lower the speed and relax.
Lastly, there are plenty of quiet fans you might prefer over the fan you currently have. For example, Dyson fans aren’t just cutting edge bladeless fans — many of them also have air purifying filters! On the other hand, if you’re not someone who enjoys living in complete silence, you might prefer white noise fans. Either way, it’ll be better than trying to fix a fan that doesn’t want to run silently.
OTHER RELATED POSTS: