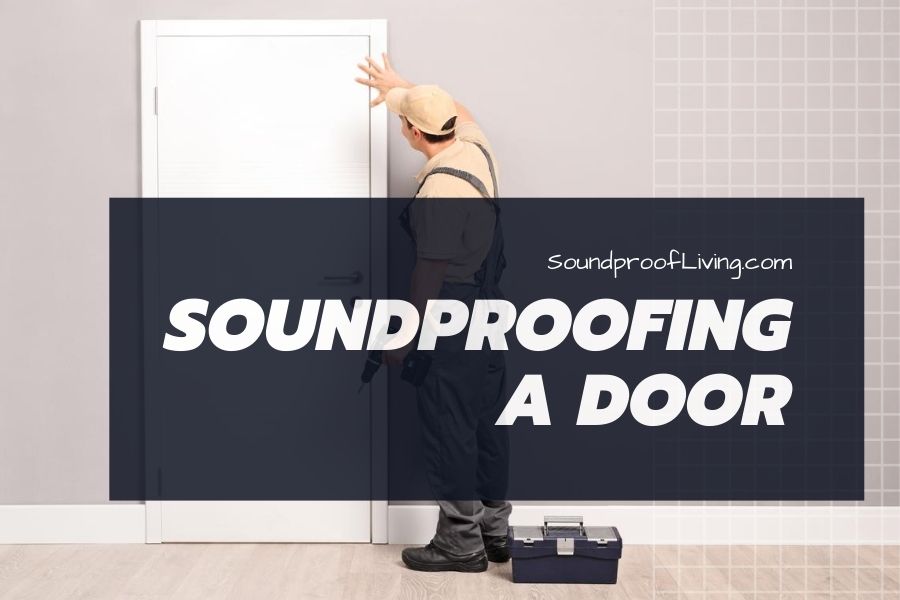
When it comes down to it, doors are just holes in our walls. It’s no wonder they’re prone to leaking sound. Still, there are plenty of ways to improve their noise-blocking capacity. If you want to learn how to soundproof a door, just follow this guide.
The list of solutions you’ll see below should answer any concerns you might have, whether you’re working on the front door or an interior one. For example, if you’re dealing with a colossal bottom gap, you’ll have to plug it with a door sweep. If the door itself is hollow, you’ll either thicken it up from the outside, try to fill it with soundproof materials, or get a new one altogether.
The cost of the whole project will depend on the extent of work you have to do and whether it can be done with items you already own.
- Why Are Doors Prone to Leaking Sound?
- 17 Easy Ways to Soundproof a Door Yourself
- 1. Install a Soundproof Door Sweep
- 2. Replace the Threshold
- 3. Install a Weatherstripping Door Kit
- 4. Use a Sealing Rubber Tape
- 5. Get New Door Gaskets
- 6. Caulk Around the Door Frame
- 7. Apply Expanding Gap Foam
- 8. Cover Your Door With Soundproof Curtains
- 9. Attach a Soundproof Blanket Over the Door
- 10. Apply High-Density Soundproofing Panels
- 11. Use Rigid Foam Insulation or Styrofoam
- 12. Thicken the Door With MLV
- 13. Reinforce the Door With Wood Panels
- 14. Fill the Inside of the Door
- 15. Install a New, Solid-Core Door
- 16. Get Rid of the Door
- 17. Use Common Household Items
- The Difference Between Soundproofing Interior and Exterior Doors
- How Much Will It Cost You to Soundproof a Door?
- Final Thoughts and Reasons to Soundproof Your Doors
Why Are Doors Prone to Leaking Sound?
We tend to place emphasis on having a well-insulated exterior door more so than having a noise-blocking interior door. So the doors in our homes often suffer from flaws such as having:
- Gaps at the bottom of the door. Most of the time, the door simply isn’t long enough to reach the floor. The solutions may include installing a thick threshold, adding a door sweep to the door, or bridging the gap with both of those products.
- Cracks between the door and the door frame. Fixing that issue is incredibly easy. All it takes is some self-adhesive weatherstripping tape, and you’ll be all set.
- Fissures in the wall around the door frame. That problem has a relatively simple solution, too. You’ll just have to find a compatible material to plug those cracks.
- A hollow core that allows sound to pass through the door itself. You could implement superficial solutions like attaching noise-blocking or muffling materials to the door. However, if you want to address the underlying problem, more drastic measures might be necessary.
Of course, most doors that leak sound have one or two of these flaws, so you may have to combine some of the following methods. As you’re about to learn, doing so will probably be a less complicated task than you might have thought.
17 Easy Ways to Soundproof a Door Yourself
To keep things from being confusing, I’ll just note that the methods of this guide are listed in order of the various vulnerabilities I’ve presented above.
So we’ll start with things you can do to plug that gap at the bottom of the door. After that, I’ll talk you through plugging the cracks between the door and the door frame, and the ones in the surrounding wall. Lastly, we’ll talk about methods you can use to thicken the door itself.
1. Install a Soundproof Door Sweep
Soundproof door sweeps are items you attach to the bottom of your door to bridge the gap between it and the floor. They can be made of metal and rubber (or just rubber) or soft foam and fabric. The kind you choose will depend on the type of door you’re dealing with. Generally, you should stick with the pillowy kind if you’re soundproofing interior doors and rubber sweeps for exterior ones.

Of course, the main purpose of these products isn’t soundproofing. The rubber ones are supposed to prevent moisture, dust, and insects from coming into your home. The other kind is supposed to prevent drafts — which is why they’re called draft stoppers. But, if it can stop a stiff wind, it’ll stop noise from entering as well.

- 【HEAVY DUTY AND DURABLE MATERIAL】- Made...
- 【ALL SEASON PROTECTION】- Protects your...
- 【INSTALLATION GUIDE】- 1)Measure the...
- 【WATERPROOF BACKING】-The Door Seal Strip...
The installation process will depend on the kind of product you opt for. If you want to attach a proper door sweep, you’ll have to clean the bottom of the door before nailing the rubber in, if you’re using the kind with a metal part. Conversely, if you don’t want to damage the wood, you can get a self-adhesive door sweep. Or, if you’ve decided to use a draft stopper instead, you’ll just slide it under the door.
2. Replace the Threshold
If your door is absurdly elevated from the ground or you simply don’t want to use a door sweep, you might have installed a threshold in hopes that it would solve the problem. It might have even worked for a time. But after taking one too many kicks, it’s finally loosened too much to be an effective defense against noise. So how do we fix that?

Well, the easiest solution is to replace the threshold altogether. The first thing you’ll need to do is measure the area where the new threshold will go. Whether you end up cutting the new threshold yourself or ordering the new one to size, you’ll need those numbers.
Before you can install the new threshold, you’ll also have to remove the one you have. Depending on the kind of threshold it is, you may be able to wiggle it out of the door frame. However, the more likely scenario is that you’ll have to pry it off or remove some screws before it’ll want to come out.
Having removed the old threshold, you should understand how the new one should go in. But first, you’ll have to vacuum and wipe the floor. Doing so is especially important if you plan on gluing the threshold down instead of nailing or screwing it to the floor.
After you install the threshold, you can caulk the crack between it and the floor as a final precaution. The process is shown in this video, but it won’t be necessary if you used an adhesive to install the threshold.
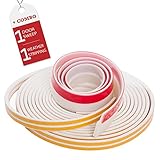
3. Install a Weatherstripping Door Kit
Weatherstripping products are meant to address the gaps between the door and the door frame or casing. The self-adhesive rubber foam tape should compress when you close the door, creating an airtight seal all around. Sometimes, these products even come with self-adhesive door sweeps, allowing you to seal all sides of the door in one go. Even though weatherstripping products are meant to keep out the chill, you can use them to soundproof interior doors as well.
If you get a D-shaped rubber strip like this one, you’ll just need to split the two strips before application. Alternatively, if the space on your door frame is particularly wide, you might leave them doubled up.
- ⭐ ALL IN ONE KIT FOR DOOR.. to seal it...
- ★ QUICK & EASY INSTALL.. with a strong...
- ★ IMPROVE AUDIO QUALITY.. by Reducing...
- ★ MINIMIZE DISTRACTIONS.. by blocking out...
In any case, you’ll want to start by applying a piece of the tape along the top side of the door frame. Measure that side and cut the tape, then press it in as you peel off the protective backing. You won’t have to cut the sides ahead of time, simply start applying from the top and cut off the excess when you get to the bottom of the door frame.
If you have purchased a weatherstripping kit, you can finish up by applying the door sweep. And it should go without saying — you’ll need to clean the door frame before doing any of this.
4. Use a Sealing Rubber Tape
If the gap between your door and the casing is especially wide, you might want to look into other kinds of soundproofing rubber products. They’re also self-adhesive, but they tend to come in a greater variety of dimensions. For example, this 0.75-inch wide neoprene rubber strip is only 0.375-inches thick, so it should be a great choice if your door connects to a wider surface.
However, if you’re looking for even more options, check out this Frost King sponge rubber tape. The width of the tape can range from 0.5 to 1.25 inches, and it can be between 0.18 and 0.56 inches thick.
5. Get New Door Gaskets
Sound-sealing door gaskets are slightly more complicated to install than self-adhesive weatherstripping tape, but they’d probably do a better job of keeping the noise out.
The main problem with self-adhesive products is that they inevitably start losing their flexibility and peeling off. Of course, that needn’t be an issue — weatherstripping tape is so cheap, you can reapply it whenever you need to. But if you want to avoid these difficulties, gaskets are a great way to do it.
Unlike weatherproofing tape, metal and rubber gaskets don’t go between the door and the door frame. Therefore, they won’t crease and lose their shape under pressure. And since you’ll be screwing them into the door frame, they’ll never come loose. So let’s talk about how you would go about installing these things.
Like before, you’ll want to start by cutting off a piece to install along the top of the door. However, since gaskets are made of aluminum and rubber, you’ll have to use a manual hacksaw, or automatic circular saw to cut it down to size. When you sever the metal part, snip off the rubber with scissors or a utility knife.
After you screw the top section into the door, you can measure the sides, starting from the top gasket. Cut off the side gaskets and install them, as shown in the video. You can combine the side gaskets with an automatic door sweep or just stick to the ones I’ve recommended above.
6. Caulk Around the Door Frame
Now that you’ve closed the cracks around the door, the ones around the door frame will become more apparent. You wouldn’t think that any noise would be able to get in that way, but it definitely can. If you can feel air currents moving around the door even with the weatherstripping products in place, the wall is the problem. Fortunately, a bit of sealant should be all you need to get that squared away.
But of course, you’ll have to be careful when it comes to picking the right sealant for the job. Acoustic caulk will not only plug the gap but also be able to withstand the natural shifting of the wall. What’s more, the superior flexibility of acoustic sealant also makes it easier to apply than regular caulk. However, the process itself looks pretty much the same.
Sealant almost always comes in 10- or 30-ounce tubes with sharp ends, which makes it easy to target those cracks. There are even ones that can match the color of the surrounding wall — or at least approximate it. And, of course, you’ll also need a caulking gun to squeeze the product out. Even those come in different sizes, so make sure you get the appropriate one for the caulking tube you have.
Even if you don’t see the fissures, aim for the areas right around the door frame or the trim. Smear the bead of the sealant as you go along to smooth it out and push it into the cracks. But wear gloves while you do so — you don’t want the sealant to get on your skin.
7. Apply Expanding Gap Foam
If you find that the cracks in the wall around your door are too atrocious to fill with caulk, you might have to bring in the big guns. And by that, I mean use expanding gap filler foam. The product name covers everything you need to know about it. Just apply it directly to the cracks and watch it expand until they are completely closed.

Before you go spraying around your door haphazardly, take a moment to read through the instructions on the spray can. You’ll definitely want to wear gloves to avoid coming into contact with the spray. It shouldn’t be dangerous, but remember, it’s meant to fill concrete and other hard materials, so it may be difficult to get off your skin. Lastly, depending on the kind of product you end up using, you may have to spray the wall down with plain water before applying the foam.
When you’re ready to start the application process, you’ll want to start at the deepest point of the crack. Slowly work toward the surface of the wall, stopping to shake the can and reapply a mist of water if necessary.
No products found.
When you finish, you’ll have some foam poking out from the wall. Give it 30–60 minutes to completely set, then cut it away with a saw or knife. Leave some of the foam poking out so you’ll be able to sand it down. Lastly, paint it to match the surrounding wall.
8. Cover Your Door With Soundproof Curtains
Even if you manage to completely seal the door and the wall around the door frame, there’s still one thing that might allow noise to enter the room. Namely, if the door itself is hollow, you’ll need to find ways to prevent sounds from passing right through it. Covering the door with soundproof curtains is the simplest and most attractive way to do that.
To begin installing your curtains, you’ll need to get a curtain rod you can attach to the wall above the door or the ceiling. It’s important to completely cover the door, leaving a few inches of fabric all around it. Some of the fabric should pool on the floor. When you need to exit the room, you’ll be able to swing the curtains to the side and pass through the door.
Of course, before you drill into the wall or ceiling, you’ll need to make sure the door is, indeed, hollow. You should be able to discern whether that is the case by simply knocking on it and comparing the resulting sound to the one a solid wood surface would produce.
In fact, you could even do this step before doing any of the previous ones on this list. After all, fixing all those other issues would be pretty pointless if you’re going to end up having to take the whole door out.
9. Attach a Soundproof Blanket Over the Door
If you want to fortify a door, using a soundproof blanket would probably be more effective than installing soundproof curtains. However, you should keep in mind that the result will look more industrial than decorative, as would be the case with curtains. What’s more, you’ll have fewer choices when it comes to the colors and material of the blankets. Still, there are ways to make it all look presentable.
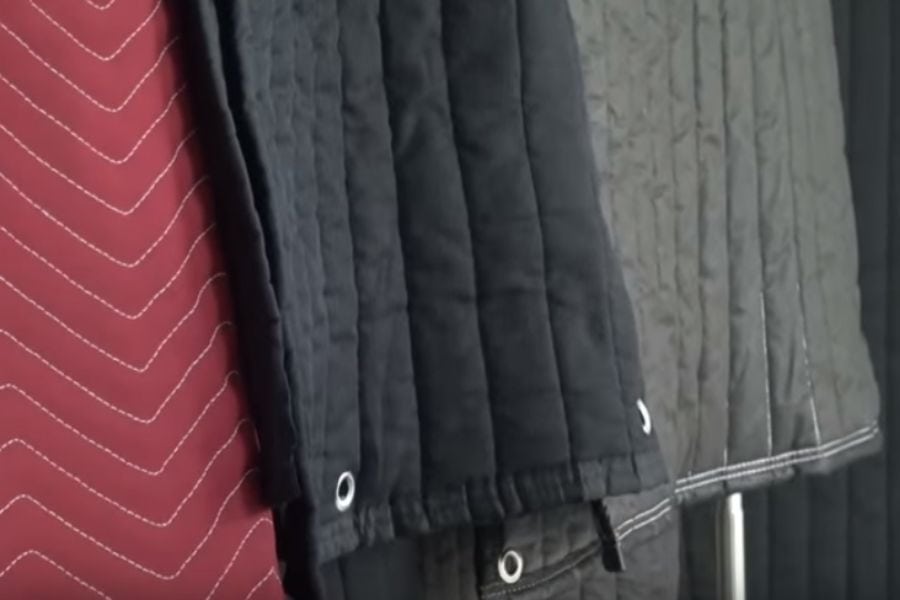
For example, you can attach the blanket above the door and roll it up when you don’t need it. You’ll have to get some ties and nails or screws to keep it up. When you need to have complete silence, unroll the blanket, making sure it’s covering a few inches around the door as well.
If you need to, secure the sides by attaching loops or elastic hair ties down the length of the blanket. Nail some tacks into the wall and use the hair ties to hold the blanket flush against the wall.
Alternatively, you can attach the blanket to the door permanently by nailing it in or using Velcro. However, you’ll still have excess fabric all around, which — frankly — won’t be necessary if you have applied all the weatherstripping products mentioned above. So you could fold the edges of the blanket in or trim them to fit the door.
Actually, if that kind of look appeals to you, you might want to look into this door panel sound barrier. It comes in different colors and dimensions. Even the doorknob cutout can be customizable. But, naturally, these personal touches also make this product pricier than a regular soundproof blanket.
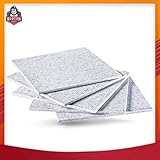
10. Apply High-Density Soundproofing Panels
If you’re going to attach anything directly to your door, let it be high-density soundproofing panels. Like soundproof blankets, these products are incredibly dense and soft. However, they’re much easier to cut through than curtains and blankets — and they’re more subtle.
The Burton Acoustix chemical-free fiber panels in marble gray have a density of 12.5 pounds per cubic foot. The 12-inch squares come in 5-piece packs, so you may need two or three packs to cover one side of your door. On the bright side, they have a noise reduction coefficient of .85. So they’ll absorb 85% of the frequencies bouncing around the room in addition to preventing some of them from penetrating the door.
- [💥SOUND PROOF💥] - Superdense 230kg/m...
- [💥VERSATILE SOUND PROOF PADDING...
- [💥1000% SAFE FOR INDOOR...
- [💥EASY TO INSTALL💥] - soundproof in...
The BXI fiber panels are about as thick as the Burton Acoustics ones, and they have a similar NRC rating. However, the panels in question are 16 by 12-inch rectangles that come in 6-piece packs — so they’ll cover a surface area of 7.7 square feet. They also come in several colors, including black, gray, smoke gray, and shallow camel (light beige).
Because these products are fiber-based, you’ll easily cut through them to allow the door handles to poke through. And when it’s time to install them, just use a double-sided adhesive like 3M’s VHB tape. Cut a piece as wide as the door and press it along the top edge, then peel off the backing and press on your panels. Trim off any excess, tape down the other sides, and move lower until the whole door is covered.
11. Use Rigid Foam Insulation or Styrofoam
If you’ve determined that your door is hollow, that means that it lacks the layer of foam insulation many doors have in their core — so why not add that on top? The best way to get through this project is to do it while your door is horizontal. However, if you really don’t want to take it off its hinges, you could complete the task while it’s still upright.

In any case, you’ll want to remove the doorknob before you start attaching the foam. When the door is completely flat, cut the foam down to size and create a cutout for the handle.
You could also use thinner foam insulation or even styrofoam. The latter may even shave a few bucks off the total cost of this DIY project. However, those options wouldn’t be as effective as the previous method on this list or some of the ones you’ve yet to see.
When you finish tweaking the insulation, you can attach it to the door with Velcro, double-sided tape, or tacks. You may even be able to glue it on with sealant. When you’re done, reinstall the door handle and put the door back on its hinges, if you previously removed it.
12. Thicken the Door With MLV
Unlike the previous method, this one allows you to thicken up your door and add to its density with a relatively thin material — mass-loaded vinyl. MLV checks off pretty much all the boxes you need here. It’s heavy and dense enough to block noise while still being flexible and thin enough to work with.
No products found.
Mass loaded vinyl is also water-resistant and exceedingly durable, which is more than you could say about styrofoam. Unlike the soft, fiber-based materials you’ve previously seen, this one will be able to stop sound waves in their tracks, not just absorb some sound frequencies. However, MLV is certainly pricier than regular soundproofing panels.
If you can, find a roll of MLV that’s at least as wide as the door itself. That will allow you to cut the length of the door out of the roll and minimally adjust the width. When the time comes to attach the material, you can use any one of the methods I’ve already listed. Even acoustic sealant would work if you don’t plan on taking the vinyl off any time soon.
13. Reinforce the Door With Wood Panels
Of course, if your door is too thin and hollow, you could always add another layer of wood on top. On its own, wood doesn’t have any astonishing acoustic properties. It does what most dense and hard materials can do — it reflects sound. However, with the help of a few other materials, it may help you fortify your door.
An added layer of half-inch thick, medium-density fiberboard (MDF) may be just what you need to enjoy some silence in your room. But there are some steps you’ll need to take before you can tack that on. Namely, you’ll have to start by taking the door off its hinges and laying it down on a work table. Take the doorknobs off and thoroughly clean the side of the door you want to work on.
Now, wood on wood isn’t the best combination, so you’ll want to separate the two boards somehow. So when you have cleaned the door, apply Green Glue all over. That should create a flexible barrier between the two layers of wood. If you want to go all-in, you can put MLV on that first layer of sealant, then top that off with sealant and fiberboard for good measure.
With the board covering one side of the door, you’ll have to drill the knob hole from the other side — but only after the sealant has completely dried. However, drilling a hole through your fortified door would kind of defeat the purpose of this particular project. So you may want to install another kind of handle on top of the fiberboard or stick to a ball and catch latch.
14. Fill the Inside of the Door
Have you ever seen what’s inside of a hollow core door? The name doesn’t even convey how poorly constructed these things are. Usually, there’s some MDF and melamine on the hinge and latch sides of the door. But between those points, hollow doors are, well, hollow — only supported by pieces of cardboard.
Clearly, that’s not doing anything in terms of noise blocking or absorption. So what can you do to get the sense of having a solid core door without having to buy one? Well, you could try stuffing some of the products you’ve seen on this list inside the door. But first, you’ll have to open it up.
One way to do that is to approach the problem from above. Cut off the very top of the door, then fill the center of the door with foam, sand, or insulation.
If you’re not afraid of drilling some holes, you can even pour expanding foam into your door. You can even see what that might look like in this video. After the foam sets, cut off the excess, sand it down, and hit it with a few layers of paint.
Alternatively, you could open the whole front layer of the door and fill it with fiber panels, MLV, whatever you can fit inside. When you finish stuffing the door, you’ll have to use glue to piece it back together. Predictably, hollow core doors don’t hold nails or screws well.
15. Install a New, Solid-Core Door
Not everyone has the time and energy to execute the previous method on this list. But if you still want a solid core door, but you don’t want to go to the trouble of making it, you’ll just have to buy one. It’s not the cheapest solution on this list, but it’s certainly the easiest.
If you’re not looking for anything fancy, you could get a solid wood door. However, if you want something extra, you could get a door that has layers of insulating foam and fiberboard inside. Both kinds of doors have their advantages, so your wallet will probably cast the deciding vote, particularly if you’re looking for interior doors.
If you’re looking for soundproof doors specifically, make sure the ones you’re looking at have a Sound Transmission Class (STC) rating in the product description. Solid wood doors generally have an STC of 30–35. But if you have particularly loud neighbors, you’ll want that number to be in the 40–55 range, at least. And, of course, when you do install the new door, you should ideally implement some of the methods you’ve learned at the beginning of this guide.
16. Get Rid of the Door
If you’re getting altogether too frustrated with the door you’re working on, you can take it out of the picture. Walling up a door is actually easier than you might think. You’ll just have to rip off the frame and build a stud grid inside the opening before filling it in and covering it with drywall. It’s not any different than soundproofing a wall once you move on from building the studs, which is a process you can see in this video.
However, not everyone will be able to just board up their door and call it a day. You’ll need to have an alternative way of getting into the room the door leads to. Still, it’s the only way to make sure the door won’t cause any more trouble going forward.
17. Use Common Household Items
If you need soundproofing solutions to tide you over until the products you’ve ordered get to your address, you might consider using some of the things you have lying around your home. Household objects can replace many of the tools I’ve mentioned above — here are some examples.
For one, you could stuff towels or rugs under your door to close that pesky bottom gap. Sealing the other edges of the door may be more difficult, but there are ways to thicken the door that would also cover the sides, such as:
- Using several layers of regular curtains instead of soundproofing ones
- Hanging up old, thick blankets (you can roll them up above the door, as I’ve described above)
- Using carpets or rugs as tapestries over the door if you don’t plan on using it
- Gluing a yoga mat or foam tiles directly to the door to increase its absorbency and blocking ability
- Moving big pieces of furniture like wardrobes or bookshelves (with closed backs) over the door, closing it off permanently
There are even some items you could make yourself. For more information, check out this article.
The Difference Between Soundproofing Interior and Exterior Doors
Interior and exterior doors come with different sets of soundproofing challenges. Exterior doors usually have solid cores, so you won’t have to worry about the sound passing through them. They’re also up to an inch thicker than interior doors and generally better insulated from the get-go. After all, interior doors are supposed to provide a visual separation of rooms more than anything else.
So how can you approach the soundproofing of these different types of doors while taking their properties into consideration? Naturally, interior doors are going to be more challenging. Still, at least you get to use materials that are easy to procure. For example, you wouldn’t be able to use a draft stopper on your front door unless you made one using waterproof fabric.
Everything that goes on an exterior door needs to be waterproof and durable enough to withstand exposure to the elements. You’ll certainly be able to use rubber door sweeps, weatherstripping tape, and soundproofing rubber. But that’s only if you’re working on a basic swinging door.
How Much Will It Cost You to Soundproof a Door?
The cost depends on the extent of work you’ll need to do. Some of the products I’ve mentioned cost only a few bucks to apply over your door, while others can cost as much as a new iPhone.
The most expensive door soundproofing solutions are probably the final two I’ve mentioned. Removing a door and buying a new one can cost a lot of money, especially if you’re looking for a replacement with a solid core. The most basic ones cost about $150, but if you want something special, you should be ready to pay upwards of $400. An acoustical core door with an STC rating of 65 or 70 can set you back thousands of dollars.
Then again, you may not have to replace your door at all. If you only need to apply weatherstripping tape and install a soundproof door sweep, you could do it for under $20. Soundproof curtains and blankets are also cheap and hang around the $50 price point. If you wanted to cover the whole door with fiber panels, you may have to shell out up to $100.
But really, there are plenty of household objects that could conceivably replace professional soundproofing equipment. So you may not have to worry about your budget at all — that is, if you’re not looking for stellar results. In any case, soundproofing your door is the one project you don’t want to skimp on.
Final Thoughts and Reasons to Soundproof Your Doors
At this point, you may be feeling overwhelmed with the sheer number of possibilities. You might not even want to soundproof your door anymore. So let’s talk about why you should go through with it as soon as possible.
As you’ll recall, doors (and windows) are the largest chinks in your home’s armor. Letting in the air is disastrous enough, especially if you have inflated AC and heating costs. But some doors also let in bugs, water, and noise. Aside from being generally distracting, that can take a toll on your health.
Of course, soundproofing your doors won’t just eliminate those problems. It’ll also help you feel more secure in your space, particularly if you share it with other people. But just as there’s more than one way to cook an egg, there are many ways to soundproof a door. Ultimately, it’ll be up to you to mix and match the methods listed above to cater to your own needs and capabilities.
RELATED POSTS: