Do you have a difficult time answering the call of nature because you are afraid that someone might hear your toilet sounds? Then worry no more. This article will give you some good ideas on how to soundproof your bathroom or toilet room and save yourself from this type of trouble.
Start your soundproofing project with the bathroom door and continue with the walls. You don’t have to fix everything at once. If you spot an area that is causing significant issues, fix it first. Then, do some tests and see how much of a difference it made (if any). If you are satisfied with the result then great. If not, then proceed with the next move.

How to Soundproof a Bathroom Door
The first area to soundproof is definitely the bathroom door. Roughly nine times out of ten it will be the door that is causing the whole issue. The reason is that nowadays interior doors are hollow on the inside (or have small cardboard pieces that are holding each door panel in place) and, for that matter, very poor at blocking sound.
Whats more, they usually have plenty of smaller or larger gaps through which sound can leave the bathroom. Fortunately, both of these problems have some simple fixes.

Caulk Around the Frame
In the best case scenario sealing some of the more significant gaps and cracks in the door frame and molding will reduce the sound leakage to the desired level. That’s why you should first get an acoustic caulk or regular sealant and get rid those gaps. I’m sure you have a tube laying in your garage, and if not, simply order it on Amazon.
Apply a Weatherstripping Tape
Next, you need to check for gaps between your door panel and the door frame. The cheapest way to seal them is to get a weatherstripping tape and apply it around the door frame. You can choose foam material, however, for the bathroom, I would recommend you use rubber weatherstripping instead. It’s a versatile product that you can use not only for doors but also for windows (including outside). So don’t hesitate to get some more and have it for backup.
It is really simple to apply. You can start by cleaning and measuring the door frame. Then, take the weatherstripping tape and cut it to the measured length. To be on the safe side, leave a bit of an extra that you can chop off after application (make sure you don’t cut it too short). The final step is to take off the self-adhesive backing and apply the strip to the door frame in place where it meets the door panel.
A couple of tips to help you successfully seal the bathroom door:
- Be careful you don’t neglect the tiniest of gaps as the sound waves will find and take advantage of them, too. For this reason, make sure you give your bathroom door surroundings a proper check.
- If you want to spot the gaps quickly and easy, try this practical test… First, turn on the lights in the room across the door. Then, turn off the lights in the bathroom and close the door. Now, take a look at the door and check if you see any light. And in case you do, it means you have a leaky bathroom door.
Get a Draft Stopper
The door has to open and close smoothly. That’s why there’s a gap between the bottom of the door and the floor. This same gap acts as a gateway for sound and becomes a major issue when it’s bigger than usual. Basically, the more significant the gap, the more sound will pass through.
To break the path, you have to cover the gap with something like a draft stopper. There are plenty of similar products out there that will do the job; however, my pick is the Door Sweep From Mr. Rice. It slides nicely over laminate, wooden, and even carpeted floors without leaving scratches or marks.
Replace Your Bathroom Door
If you knock on your bathroom door, how does it sound and feel? Hollow or solid? The problem with hollow doors is the thin and light composition that makes them affordable but really poor at stopping the sound.
And worse, sometimes a hollow door can even amplify the sound. In other words, it’s like having a giant speaker keeping everyone up to date about your toilet activities. Or at least that is how it feels at the time.
You can tackle this problem in two ways. The pricier way is to take out the old hollow-core version and replace it with a new hardwood door. And the other one is to roll up your sleeves and soundproof the bathroom door yourself.
Hang Soundproof Blankets
The easiest way to thicken the door is by hanging a soundproof blanket made of heavy and dense material. I advise getting a blanket with grommets as it will be so much easier to attach.
Then, take a hammer and a couple of nails and tack the blanket to the two top of the door frame. Or even better, install a couple of hooks, so you can hang and remove the blanket at will.
Choose Another Method
There are multiple other ways to soundproof a bathroom or toilet room door. For example, you could tack a layer of rigid insulations on top of the door, or hide it behind fiberglass panels.
If you want to find out additional methods, then read this article: How to Soundproof a Door.
Soundproofing Bathroom Walls
If you’ve implemented one of the tips mentioned above, or even better, if you have combined two or more of them, then by now you should have the sounds locked inside of the bathroom. However, sometimes it’s not the door that is the problem. Thin bathroom walls with cracks need to be soundproofed as well.

Seal the Walls with a Joint Compound
Every wall will eventually develop cracks. They are a result of natural settling of your home over time. That applies to bathroom walls in particular, as they are regularly exposed to water and moist. So what to do if you find cracks?
If they are small, then simply fill them with a joint compound that is extending at least a couple of inches to each side. Then, leave it to dry. Next day, if needed, apply another layer. Otherwise, start with sanding it until it is smooth. In the end, you can paint over the fixed part or put a wallpaper to hide it.
Make Your Bathroom Walls Thicker
The best way to soundproof a bathroom wall is to add an extra layer of drywall with a damping compound (like green glue) and a soundproofing material (like MLV) in between.
This combo requires more time and knowledge. Additionally, it’s definitely not the cheapest method too. However, it makes the most significant difference regarding noise reduction. Here is a full step-by-step guide on how it’s done.
Just remember, the thicker and denser the new layer is, the better it will be at blocking sound. That’s why, if you can, apply two or more layers and not just one. And of course, don’t forget to make sure the drywall is waterproof – just in case you steam up the place every time you take a shower.
Use Towels to Absorb Sound
If you don’t want to spend (too much) money, you can try some simple tricks as an alternative. For example, you could take thick and fluffy towels and tactically position them on the shelves and rods around the bathroom. They will soften the surfaces and absorb the sound before it leaves the bathroom.
Another cheap way to reduce echoes are acoustic foam panels, but because of the foam material, they are probably not the best idea for bathrooms.
If you want more cheap ideas for walls, I have a full article on this topic. You can find it here: Cheap Ways to Soundproof a Wall.
Do You Need to Soundproof the Floor?
If you are trying to block bathroom sounds from reaching adjacent rooms, then bathroom floors shouldn’t be too big of an issue. But nonetheless, it is still beneficial to add some soft padding that will decrease the sound levels by reducing echo and reverberations.

Bathroom rugs and mats are an easy way to enhance the aesthetic appeal of your bathroom and reduce echoes at the same time. There is a variety of options on the market, so you don’t have to worry about matching them to your design. They are also super affordable, easy to install, and will help you save a ton of time. Just a quick tip, pick the fluffiest mats and try to cover as much area as possible.
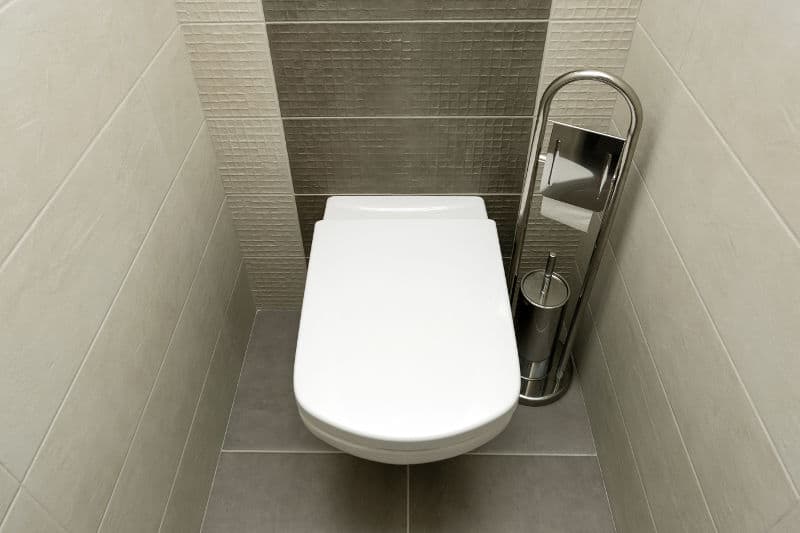
DIY Hack for Soundproofing a Toilet
When you have a big family, and you don’t have a soft-closing toilet seat, there’s a high chance of being annoyed by the constant sound of the lid crushing against the toilet and the tank. Of course, you could ask everyone to be more careful, but we all know how this goes. They stop for a day or two but soon return to their old ways.
That’s why take things into your own hands. Apply this DIY trick for soundproofing toilets:
- Get a pack of self-adhesive silicone pads for shoes (like these).
- Stick the first pad on the top of the toilet seat cover. Make sure you place it where the toilet cover touches the flush tank when you raise it.
- Then, take the second pad and stick it to the bottom side of the seat cover (where it touches the toilet seat).
- Finish off by attaching the rest of the pads between the seat and the toilet.
Watch this video:
Soundproofing Bathroom Pipes and Plumbing
Finally, here are some surefire methods for soundproofing your bathroom pipes and plumbing system.
Wrap the Pipes in MLV
Among the most effective means of soundproofing your bathroom pipes is with mass loaded vinyl. This soundproofing insulation material has a high STC and can be easily wrapped around most plumbing pipes.
Ideally, your mass loaded vinyl should be around 1/8” thick. This is good because it means that it does not take up too much space. By affixing this soundproofing material to pipes that make noise, you can quiet things down without building up other obstacles.
What’s more, mass loaded vinyl is pretty flexible, so you should not have any problem wrapping it around the pipe no matter its size or shape.
Apply Sound Deadening Materials
On the other hand, maybe you’re looking for materials that are still more flexible, in which case, you’ll want to add sound deadening materials. These were primarily made for sound deadening cars but can be attached to any number of surfaces, from the bathroom pipes to the surrounding area.
These materials absorb and help deaden the noise inside the area in question. They also do a great job of reducing vibration. The result is a much quieter bathroom.
Change the Plumbing Lines
It may be helpful to change the plumbing lines leading into your bathroom. Just be careful that you have enough room to work with and don’t cause a bigger plumbing problem in the process. You’ll need to make sure that you have a couple extra inches between your pipes and the wall, so take that into account when planning your noise reduction strategies.
If the pipes are loose due to vibration or other causes, try tightening them again. Other pipes (especially copper ones) expand and can make “ticking” noises in the heat, in which case you need to find ways to cool or shield them from the heat.
If those options don’t work or aren’t appealing, you might simply decide to insulate the area around the pipes instead. Make sure the entire wall cavity is fully insulated.
Final Thoughts
Which of these options is right for you will ultimately depend on your bathroom setup. Take the time to review the arrangement of your pipes, the thickness of the bathroom walls and doors, and then take the necessary steps. Whatever your approach, you can soundproof the area and make bathroom usage a quieter affair for everyone.
It’s interesting that when we’re soundproofing the bathroom, we want to contain the sounds within this particular room and stop them from leaving. On the other hand, when we are soundproofing other places, like for example bedrooms or baby rooms, we are trying to achieve precisely the opposite and prevent the noise from entering. However, that’s just an interesting fact that doesn’t change anything.
Have you tried something else and want to share it with us? Leave a comment!
RELATED POSTS:
None of these seem to meet our problem. We live in an apartment. The apartment above us is rented to 4 guys. Each time they use their toilet we can hear the noise of them peeing. The noise spreads all over our apartment.
I’ve been wondering why it is so noisy. The floor between the apartment is concrete and it is very good at not transmitting most sounds – they can talk, laugh, even have a party without it disturbing us too much. But then they pee, it is is noisy.
Is there some way they could put sound insulation under their toilet to dampen this irritating noise?
Hey Mat. It’s likely that the noise from the toilet is traveling through the plumbing or the surrounding structure rather than the concrete floor itself. You might want to explore options for soundproofing around the pipes.