Are you into music? Of course you are; that’s why you’re browsing online for ways on how to soundproof a closet and turn it into a recording booth. And don’t get me wrong, I feel you. I’m something of a musician myself and let me tell you — there’s nothing worse than having neighbors complain about my “damn guitar strumming.”
But just like you, I looked for ways to soundproof parts of my home so that I can practice. Now, not only can I play anything I want, but I can also record sound with almost zero outside interference. And after reading this text, you’ll be able to do that, too!

Benefits of Soundproofing Your Closet
If we’re talking about music and sound recording, a soundproof space will help you immensely. For example, you’ll be able to record amazing sound without anything from outside or inside getting mixed up with what you’re recording. In addition, the sound will be clearer, better and have little, if any, interference.
But let’s move beyond recording sounds and making music. What are the everyday benefits of a soundproof walk-in closet?
Imagine you’re living in a noisy neighborhood. And maybe not intentionally noisy; the neighbors might just have thin walls. With a soundproof closet, you can actually have your peace of mind. You can relax, watch TV, read a book, listen to music, fiddle with your computer, or even have a conversation with someone whom you can actually listen to clearly for once.
On the other hand, you might work from home. In the grand tradition of modern millennials and Carl from Aqua Teen Hunger Force, you’re doing freelance stuff from your closet, which you converted into a study, or maybe making music or recording YouTube videos. You will need all the silence you can get, and a soundproof space in your house delivers. If your closet is big enough, like walk-in closets some people have in their home, you can easily convert it into a soundproof “job area.”
Finally, you can always have that “one place” where people drop in to relax and play games. And again, a walk-in closet can also serve this purpose if you…well, repurpose it. In a soundproof closet turned into a game room, you can play arcade games, board games, video games or really anything without having to hear the outside noise.
Prepping the Closet for Soundproofing
Now that you know the benefits of having a soundproof closet, you can start preparing to convert it into a recording booth. However, there’s a lot of work to be done before you begin hammering or sawing anything.
Earlier I mentioned walk-in closets. Personally, I find those to be the best in terms of space and functionality. However, you don’t really need that big of a space. A simple closet that perfectly fits one person can do. If you happen to have more than one closet, ask yourself “what will I use it for exactly?” I’ve met countless people who converted a space that turned out to be smaller (or larger) than what they needed it for.
OK, now that you’ve decided what you’ll use your soundproof closet for, it’s time to start clearing it up. Naturally, this means emptying it and storing the things that were in it somewhere else. But it’s not JUST that. You’ll also have to remove shelves, metal pipes that you hang clothes on, racks and anything else.

The keyword here is “maximize the space.” And yes, this applies to small closets as well. Nobody can work in the middle of clutter, even if the room you’re in has a lot of space.
One last thing that you definitely have to take care of is lighting and power. Most of your equipment runs on electricity, and it’s only natural to have a good light source if you’re working at night. As such, make sure to mark all the power outlets in the closet and test them beforehand. If you don’t have any in your closet, call an electrician and install a couple.
Top 7 Methods to Soundproof Your Closet
There are many ways to soundproof a room, and closets don’t differ much. However, I should note that I’ll focus on the cheapest methods possible. A few that I mention will still be a bit costly, but if you can afford them, more power to you.
Let’s go through these methods together.
1. Install an Additional Layer of Drywall
Installing a new layer of drywall is one of those costly soundproofing methods. However, it’s very effective, and you’ll get your money’s worth.
If I took a wild guess, I’d say your closet already has a layer of drywall. Still, its mass is not enough and allows sound to pass through. Naturally, a new layer will help a lot but won’t fix the whole issue. What you need is to put Green Glue (or similar compound) between the layers. Green Glue decouples both layers, and that’s what your new recording booth needs.

Again, I must stress that this method will cost you the most. After all, you’re basically doing minor construction and investing in solutions such as Green Glue. Those don’t come cheap, but they’ll pay for themselves if you’re going to use the soundproof closet.
Speaking of Green Glue… Green Glue is often used for something called “damping.” As its name suggests, it dampens the vibrations by dissipating the kinetic energy from them.
You should note that you can use Green Glue for more than just fitting it between two bits of drywall. In fact, you can use it with plywood and with MDF, or medium density fiberboards. It’s perfect for walls, floors, ceilings, and even doors.
2. Hang Acoustic Panels on Closet Walls
From the most costly method, we move onto the cheapest one. I would argue that they’re both equally effective, even though in a different way. As I said, drywall helps to stop the sound from passing through a wall. Acoustic foam, on the other hand, does not prevent it from leaving or entering, but from bouncing around the closet.
You’ve surely seen acoustic foam panels in studios, maybe even in a few apartments. Usually, they look like soft rows of small pyramids or triangles. They vary in size and shape, but they almost always get installed in the form of a panel. Hence the name.
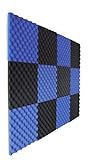
- PRODUCT IS SHIPPED AS 6 TILES, BLUE/CHARCOAL...
- Smaller sound proof padding panels offer more...
- Good for Recording Studios, Vocal Booths...
- Note: Can help increase sound clarity in a...
Of course, having foam panels by themselves isn’t enough. You’ll probably want to combine them with a different technique for a better result.
Acoustic foam panels come in similar shapes and patterns because they have been proven to reduce reverberation and absorb echoes. As someone who records music daily, I have these panels on every single wall of my two studios. In fact, I found my acoustic foam cheap online, and you can do it too.
3. Install Wall-to-Wall Carpeting
Yes, it sounds silly, but a nice, thick carpet will more than help you with sound absorption, especially if it’s a thick, interlocking carpet. Those are as strong as acoustic foam when it comes to dimming sound.

But why carpets? Well, for one thing, they provide awesome floor soundproofing. Whether you’re on the ground floor or anywhere above or below it, your floor will make noise, as will whatever is under it.
However, carpets work even beyond that. Sound bounces off of hard surfaces. A simple, thick carpet will prevent the sounds bouncing and making echoes.
4. Use Blankets, Especially Soundproof Blankets
What a carpet does for the floor, a blanket can do for a wall. I tested this personally before I had any proper studio equipment. Trust me, it works.
A thick blanket will absorb or dampen sound waves wherever you place it. It works well for walls because you don’t have to pay top dollar for an additional drywall layer or fiddle with acoustic foam. All you need are some old blankets and presto – you have a soundproof closet.
But not all blankets are that thick. That’s why I asked a friend of mine (also a musician) for advice on this topic. Right off the bat, he said “just use moving blankets. You can buy them on Amazon, or get used ones on eBay.”

- SPECS - Length: 80 inches | Width: 72 inches...
- PREMIUM POLYESTER MATERIAL - Padded moving...
- REUSABLE FURNITURE MOVING BLANKETS - Use our...
- UTILITY BLANKET - Our large moving blankets...
If you’ve never moved before, my reader, allow me to explain what a moving blanket is. A moving blanket is a thick piece of cloth movers put around certain fragile objects during the move. They are also called moving pads and furniture pads.
You can literally buy them in bulk from major retail websites such as Amazon or from major retail chains like Walmart. They will save you the money you’d have invested in adding drywall or pasting acoustic foam. What’s more, they will also soundproof your closet perfectly.
5. Add Bass Traps
Before I get into this topic, I should note one thing. You’ll probably only need bass traps if you want to reduce low-frequency sounds. But if you’re not producing low-frequency sounds, you can skip this step.
A bass trap is an absorber of acoustic energy. The main goal behind bass traps is to get a flatter, smoother low-frequency sound and get rid of all the bass noise. This is the reason why most recording studios have them. Of course, your walk-in closet will be more than a good fit for one of these babies.
Usually, the best place to set a bass trap (no pun intended) is the corners of the room. However, bass traps come in many shapes, including wide, broad panels. That means you can easily put them on the wall, and they’ll work like a charm.
6. Get Reflection Filters
Most of what I listed above involves either DIY construction, reconstruction or a combination of the two. However, you might be living in an apartment whose landlord doesn’t allow you to change it. In other words, he doesn’t want you to add another drywall to a closet, and he likes the carpeting it already has.
But there’s even a solution for this issue. When in doubt, get yourself a reflection filter.
The first thing you’ll notice about an average reflection filter is that it’s curved. That way, it absorbs more sound, and it does so more evenly. Another important bit of information is that all reflection filters are already treated to dampen sounds. That is literally their purpose.

- Eliminate Interference: Sharp 1.7 inch thick...
- Flexibility & Convenience: The three panel...
- Durability: Constructed out of premium steel...
- Versatility: The microphone isolation shield...
Sadly, this isn’t the best solution if you want to use a large walk-in closet. Reflection filters work best when you use them in a small, tight area.
7. Fill Up Any Air Gaps
No matter how soundproof you think your closet is, there are always the finer details. One of these includes the many small openings in walls or around the doors. Sometimes it’s a crack, sometimes it’s a hole, but whatever it is, it will allow sound to enter your closet.
As such, you have to fill these holes and cracks up. Luckily, there are different ways to do this, and it all depends on what you want to plug up.
For example, you can seal nearly every gap or crack in the room with acoustical caulk. It’s a bit different from regular caulk because it’s specifically made to deal with sound. Not to mention that it’s soft and stretchy, so you won’t have to worry about new cracks forming.
Then, there are those pesky door gaps. You know, those under the doors. Normally, people would just think of shoving a towel under there and being done with it. But I’ll reassure you that there’s a more permanent solution.
If you’re worried about the gap under the door and don’t feel like dragging a towel down there every time you want to record sound, just buy yourself a door sweep. It plugs up the space underneath the door and reduces any sound that might come through to nothing. It’s a smart investment.
Bonus Soundproofing Tips
Sometimes people don’t have the money to build a DIY recording booth out of nothing. I understand that, having gone through that myself. That’s why I’d suggest getting noise-canceling headphones when you’re starting out.
Yes, they won’t really help when it comes to recording pure sound with zero noise. But they can at least give you peace of mind if you live in a noisy neighborhood.
Next, you might be using a PC, a laptop, or any other electronic device. Whatever it might be, it will produce noise. As such, I’d suggest building an Isobox (a casing that cancels out PC noise and cools the computer).
If your A/C is bothering you, you can remove its vents or seal up any cracks in the wall around it. Alternatively, you can build a sound dampener to put in front of the A/C and soundproof it while you work.
RELATED POSTS: