If you want to know how to soundproof a basement ceiling, you’re probably interested in preventing noise from rising into your home. After all, when they’re not being used as wine cellars or storage rooms, basements can serve several other purposes. Most notably, they can double as male sanctuaries, entertainment rooms, or music studios.
Of course, most of those functions tend to be pretty noisy. But even if you’re just using your basement to escape a noisy household, your soundproofing efforts will have to focus on the ceiling. Still, before you learn how to bolster that surface against noise, let’s start with the basics.

- Types of Noise That Travel Through Basement Ceilings
- Steps for Soundproofing an Exposed Basement Ceiling
- Soundproofing Solutions for a Finished Basement Ceiling
- 1. Lay Down Thick Carpeting on the Floor Above
- 2. Rearrange the Furniture Above
- 3. Use Mass Loaded Vinyl as Carpet Underlay or to Thicken the Ceiling
- 4. Install Acoustical Ceiling Tiles
- 5. Attach Acoustic Foam Panels to the Basement Ceiling and Walls
- 6. Hang up Stylish Acoustic Fabric Panels
- 7. Use Styrofoam Panels or Tiles as a Cheap Alternative
- What Is the Cheapest Way to Soundproof a Basement Ceiling?
- About Soundproofing Basement Doors and Windows
Types of Noise That Travel Through Basement Ceilings
There are two main concerns in any soundproofing project — airborne and impact sound. The main difference between the two is that they move through different mediums. Because of that, you’ll have to use different techniques to neutralize each type of noise.
Airborne Noise
To begin with, let’s define airborne noise. As you know, sound cannot travel through a vacuum. It moves by vibrating different kinds of particles, though gases are probably the least effective transmission mediums. Still, most of the sounds we register in day-to-day life are classified as airborne noise.
Surprisingly, though, that may not be as big of a concern when it comes to soundproofing a basement ceiling. After all, ground floors usually don’t have notable cracks that could allow sounds to pass into the basement. So if your basement is fully below ground with only one access point — the door — that’s the only area you’ll have to fortify against airborne noise.
Impact Noise
Believe it or not, gas isn’t the most effective medium for sound transmission. Soundwaves travel much faster through liquids and solid materials. That’s exactly what makes impact noise so difficult to prevent — unless you understand the concept of decoupling.
Simply put, impact noise travels through the structure of a building. It is essentially a physical representation of low-frequency sound waves. So if you have a subwoofer on the floor, the bass vibrations could pass right through the subfloor to the ceiling below. If we reduce or eliminate the point of contact between two parts of a structure, we can cut off noise transmission.
Steps for Soundproofing an Exposed Basement Ceiling
There are two ways to prevent noise from coming into your basement. However, your choices will depend on the state of your ceiling. Some methods are more useful when you’re working with a finished surface — but I’ll explain those later. To begin with, let’s discuss how to soundproof an exposed/open basement ceiling.
1. Stuff Insulation Into the Ceiling Joists
If the ceiling in your basement isn’t finished yet, you should be seeing empty wooden joists when you look up. To prevent sound from passing through the floor above, you’ll need to fill that space before you do anything else. But what if your ceiling was hastily covered during construction?

In that case, you’ll have to start by determining if the surface is already stuffed with insulation. Basement ceilings are usually finished for the sake of appearances so that may not be the case. Since we’re looking to improve the acoustical value of the ceiling, you’ll need to drill into the drywall to see if the space above it is full.
If it’s not, you’ll have to tear it down and start anew. When you reach the wooden joists, proceed with installing the insulation. Batt insulation will be the easiest kind to stuff into a ceiling — you’d just push it up and the joists would hold it on their own.
When that’s done, you might have to attach a vapor barrier over everything before moving on. For more details, I invite you to check out the article I’ve linked above.
2. Install Resilient Channels Across the Joists
After you push insulation into the ceiling, you’ll install resilient channels at a 90-degree angle to the joists. The metal railings will provide a flexible buffer between the wooden beams that make up the bones of your home and the drywall you’ll put up next. That will effectively decouple the two surfaces, preventing impact noise from transferring between them.
As I have said, resilient channels should run across the network of ceiling joists, with the first one starting about six inches from the wall. Each subsequent channel should be about sixteen inches away from the previous one. However, most manufacturers will include those kinds of specifications in the product instructions.
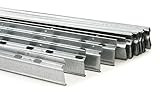
- Decouples drywall layer from the supporting...
- Installation information provided
- Product is used to hang drywall instead of...
- For best sound isolation, Auralex recommends...
If you want to have an additional degree of separation between the joists and your drywall, you could use sound clips and hat channels instead of basic resilient channels. But since both products have about the same purpose, your choice won’t make much of a difference.
3. Screw on Your Drywall Sheets
After you set up your network of resilient channels, go ahead and install your drywall. At this point, you should have already thought about the type of drywall your project requires and ordered enough to cover the whole ceiling. Now, you just need to get through the installation process.
But before you begin, a word of caution. If you’re not adequately prepared for it, that may end up being more than you bargained for. So do yourself a favor and rent a drywall lift for the day or week when you’re planning on installing the ceiling. As shown in this video, those tools will hold the plasterboard sheets up while you screw them into the metal channels.
Remember, your screws should go through the resilient channels only! You shouldn’t connect them to the joists in any way. Otherwise, the decoupling process would fail.
Additionally, you’ll need to keep lighting and ventilation in mind throughout the process. So as you’re installing in the insulation, vapor barrier, and drywall, you’ll need to cut around vents and electrical parts. As for resilient channels, just avoid putting them right over a lighting fixture.
4. Add Another Layer of Drywall Smeared With Green Glue
If you’ve ever looked into wall soundproofing techniques, you’ve probably heard about the Green Glue sandwich. It’s the method of fusing two layers of drywall with a coat of Green Glue compound between them. Well, using that trick on the ceiling will be difficult but not impossible — as long as you have that drywall lift!
You see, Green Glue is an acoustic sealant that turns soundwaves into heat upon contact. However, it can only work if you stick it between two firm surfaces, which is where the drywall comes in.
After you spread the Green Glue onto a sheet of drywall, you’ll lift it to the already-installed drywall and hold it there until the two sheets fuse. You can also screw this layer of drywall into the resilient channels if you mark where they are in advance. Just use the previous screws as guides — and get slightly longer ones for the second layer.
If you rented only one drywall lift, be prepared to work on this step for several days. On the other hand, if you don’t have that kind of time on your hands, feel free to skip it. You could achieve similar results by applying MLV and/or constructing a suspended tile ceiling.
5. Plug the Gaps Acoustic Caulk
Whether you have two layers of drywall on your ceiling or just one, you’ll have to plug the gaps between the individual sheets before adding the finishing touches. After all, if you leave those cracks there and between the ceiling drywall and the walls, airborne noise will still be able to pass in and out of your basement.
So how do you deal with this problem? That’s easy — get a caulking gun and a tube of acoustic sealant. Squeeze the product out between each sheet of drywall and along the cracks between the ceiling and the wall. As you apply it, push it into the gap with a finger — just don’t forget to wear gloves!
6. Add the Finishing Touches
Smoothing the caulk out will also prime your ceiling for the finishing touches you’ll have to add. That’ll be everything from painting it to putting in light bulbs, covers, and vents. And if you did everything right, it’ll be the end of your project!
But if that somehow didn’t banish the noise — try one of the following tips.
Soundproofing Solutions for a Finished Basement Ceiling
Now that we’ve discussed ways to insulate your basement ceiling from within, let’s talk about methods you can use if the surface in question is already finished and you don’t want to use drywall. There are two approaches you can take here. Either deal with the problem from above or add materials to the ceiling from below.
1. Lay Down Thick Carpeting on the Floor Above
If you’re soundproofing the basement ceiling of your home, you probably have access to the floor above. If that’s the case, the best way to approach this project would be to make sure the surface above your basement ceiling is insulated. Laying down some carpets and rugs should do the trick without breaking the bank.

Keep in mind that you’ll have to cover high-traffic areas in the rooms above the basement or install wall-to-wall carpeting. Either way, thin rugs won’t cut it — so stick with thick and soft carpets. Alternatively, you could use different materials (like exercise mats) as underlays or stack carpets on top of each other.
If you use rubber or vinyl as your carpet underlay, this tip could prevent airborne sounds as well as impact noise from passing through the floor. Still, there are other things you can do to the floor above your basement to make it more impenetrable to noise.
2. Rearrange the Furniture Above
While you’re in the rooms above your basement, there’s another way to affect the acoustic properties of the space below. You should simply rearrange the furniture so that the bulkiest pieces are above the weak spots. Of course, before you start pushing tables, sofas, and bookshelves around, you’ll need to find those vulnerable areas.
Spend a few days in the basement analyzing the pattern of noise that makes it into the room. Put a bit of painter’s tape wherever you identify the sound and figure out which room aboveground corresponds with the areas you’ve marked.

Once you understand where the noise is coming from, go upstairs and see what furniture you can use. Then, it’ll just be a matter of pushing it over the weak spot to prevent people from treading on it. Still, even though this solution should be effective for both airborne and impact noise, it won’t work if the whole floor above the basement is compromised.
If the flooring is detached from the subfloor, you may have to nail it down to prevent it from making noise. On the other hand, if only certain areas are affected, moving the furniture over them should work just fine. Best of all, since you’d be working with items you already own — implementing this method won’t cost a dime.
3. Use Mass Loaded Vinyl as Carpet Underlay or to Thicken the Ceiling
Mass loaded vinyl is a product you can use pretty much anywhere. In this particular case, there are several ways it can help. However, if you want to stick with superficial applications only, either put it under the carpets on the floor above the basement or attach it directly to the ceiling.
MLV is an incredibly dense yet flexible vinyl material that is sold in rolls. It doesn’t take long to flatten out so you could just use it as a carpet underlay on the floors above the basement. Alternatively, if you’re set on attaching it to the ceiling from below without taking the existing drywall off, you could nail or staple it on.
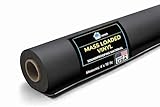
- High-Efficiency Sound sound barrier quiet...
- Mass-loaded vinyl 1 lb sound proofing for...
- Environmentally safe - Non-toxic and...
- Improve sound quality, creating a serene...
Still, since the material only comes in black, you might not want to have it exposed. There are several ways to install it on your ceiling while keeping it out of sight. For example, you could always construct a drop ceiling with resilient channels and drywall.
4. Install Acoustical Ceiling Tiles
If you don’t want to hide the MLV on your ceiling with drywall, acoustical tiles are always an option. These kinds of ceiling tiles are generally between ⅝ and ¾ of an inch thick so they’ll add mass to your ceiling in addition to helping conceal MLV.
If you already have the perfect ceiling tiles to finish your suspended ceiling, this video might come in handy. As you’ll see, the project will involve no small amount of math. But once you set up the metal channels, sliding the tiles in should be fairly easy.
Best of all, this method should work even if the space above the tiles is empty. The air itself should lock in some of the soundwaves that try to enter or escape the basement.
Indeed, acoustic tiles should have an effect even if you slap them directly onto the existing drywall. Since they’re porous, they should increase the level of acoustic absorption in the basement either way. That may not stop noise from coming in or going out, but it’ll make the room more acoustically pleasing. But if you really wanted to achieve that result, you could simply use acoustic foam or fabric panels instead.
5. Attach Acoustic Foam Panels to the Basement Ceiling and Walls
As established, acoustic foam panels aren’t that effective when it comes to blocking out sounds. However, if you’re considering installing ceiling tiles for the sake of absorption, you may prefer foam tiles instead. If nothing else, at least they’ll improve the acoustics in your basement.
After all, most basements, even those that serve as living spaces, have open floor plans. At best, they may have a separate bathroom. So even if you fill them with absorbent furniture, you’ll have to contend with plenty of sound-reflective materials. Putting acoustic foam panels on the ceiling and strategic sections of the wall should all but eliminate echoes and reverberations.
After all, we tend to register those reflective phenomena as being much louder than the original sound. So if you want to keep your basement as quiet as possible, find acoustic foam tiles that suit your style.
6. Hang up Stylish Acoustic Fabric Panels
If you want to make a space look sophisticated, you might want to opt for acoustic fabric panels instead of basic foam tiles. The two kinds of products can be equally effective — that will ultimately depend on the thickness of the individual panels.
Still, fabric panels do seem to look a bit more modern, even if you make them yourself. As luck would have it, that’s actually pretty easy to do. You just need:
- Wooden planks for a frame (and the nails or staples to put them together)
- Insulation batts or any kind of spongy materials — some people stuff their fabric panels with towels and folded blankets
- Plywood for the backing
- Fabric to cover the whole thing and a stapler to attach it to the back
Whether you make or purchase your fabric panels, you’ll be able to hang them up on the walls or attach them to the ceiling with Z-clips or L-brackets.
7. Use Styrofoam Panels or Tiles as a Cheap Alternative
If you don’t want to invest too much money in this project, you could use styrofoam instead of acoustical ceiling tiles or fabric panels. It wouldn’t be as effective as those products, but it would soften the reflective surface of your ceiling.
Moreover, styrofoam would be the perfect material to use if you wanted to cover MLV. And you wouldn’t even have to use plain old styrofoam panels for the job. Plenty of companies make perfectly decent styrofoam ceiling tiles — and they’re usually safe to paint over, too!
What Is the Cheapest Way to Soundproof a Basement Ceiling?
The cheapest way to soundproof a basement ceiling is to insulate the floor above it. Just roll out some mats and carpets you already have lying around and be done with it. However, if you’re working with a larger budget, you could install a soundproof underlayment under the flooring.
The latter option would make the floor itself denser, fuller, and overall bouncier. That would simultaneously absorb most impact noise and prevent airborne sounds from passing through the subfloor. However, installing underlayment would be a much more strenuous process than laying down some carpets — even if you have to order underlays to put under them.
Moreover, it would certainly be more expensive than laying out carpets. Of course, if you don’t already have some rugs at home, buying new ones certainly won’t be the cheapest solution. Instead, try rearranging the furniture as suggested above. The method won’t be as effective as stuffing insulation into the ceiling or floor joists, but it’ll tide you over until you build up your soundproofing budget.
About Soundproofing Basement Doors and Windows
As we have established, most of the noise that comes in and out of your basement will pass through the ceiling. However, there are other potential ports of entry you might have to deal with before your basement will be truly soundproof.
Most basements have at least one tiny window to let light and air into the room. That makes soundproofing that access point fairly straightforward:
- Install weatherstripping tape between the window and the window frame
- Apply caulk or expanding insulating foam between the window frame and the wall
- Cover the window with soundproof curtains or make a window plug for it if natural light isn’t a priority
You’ll have more luck soundproofing the door since you probably won’t have to deal with glass. First, weatherstrip the sides and close the bottom gap with a draft stopper. If the door is hollow, you’ll also need to thicken it with MLV or a soundproof blanket.
When you finish with these last few steps, your basement should be pretty well insulated. Finally, you’ll be able to rock out with your band or enjoy your entertainment setup without bothering your housemates!
RELATED POSTS:
- Does Sound Travel Up Or Down?
- Ceiling Attenuation Class (CAC) Explained
- Best Soundproof Insulation For Walls And Ceilings
- How To Soundproof A Room For Drums

Very informative. I was looking for a way to install soundproof insulation in ceiling of a basement spa room. The information has helped a great deal and plan to proceed.
Hi Gary! Thanks for your feedback! We’re glad the information was helpful for your project. Best of luck with your installation, and hope it brings you the peace and quiet you’re looking for!